Microsoft Lifecam Studio - gone after firmware upgrade
The Microsoft Lifecam Studio (= MLS) is a Microsoft-made HD webcam that has got some attention in the past due to a somehow faulty firmware upgrade procedure that rendered lots of units useless (the Microsoft Forum has a long thread regarding this issue). The good news is that the MLS can be resurrected without sending it back to Microsoft (on your own cost btw), the bad news is that it will require some additional hardware and good soldering skills...here is a detailed description of the procedure.
Opening the MLS
The webcam is closed from both sides. On the lens side, the adhesive-fixed plastic frame that holds the filter glass can be pulled out (gently, you don´t want to damage either of them...).
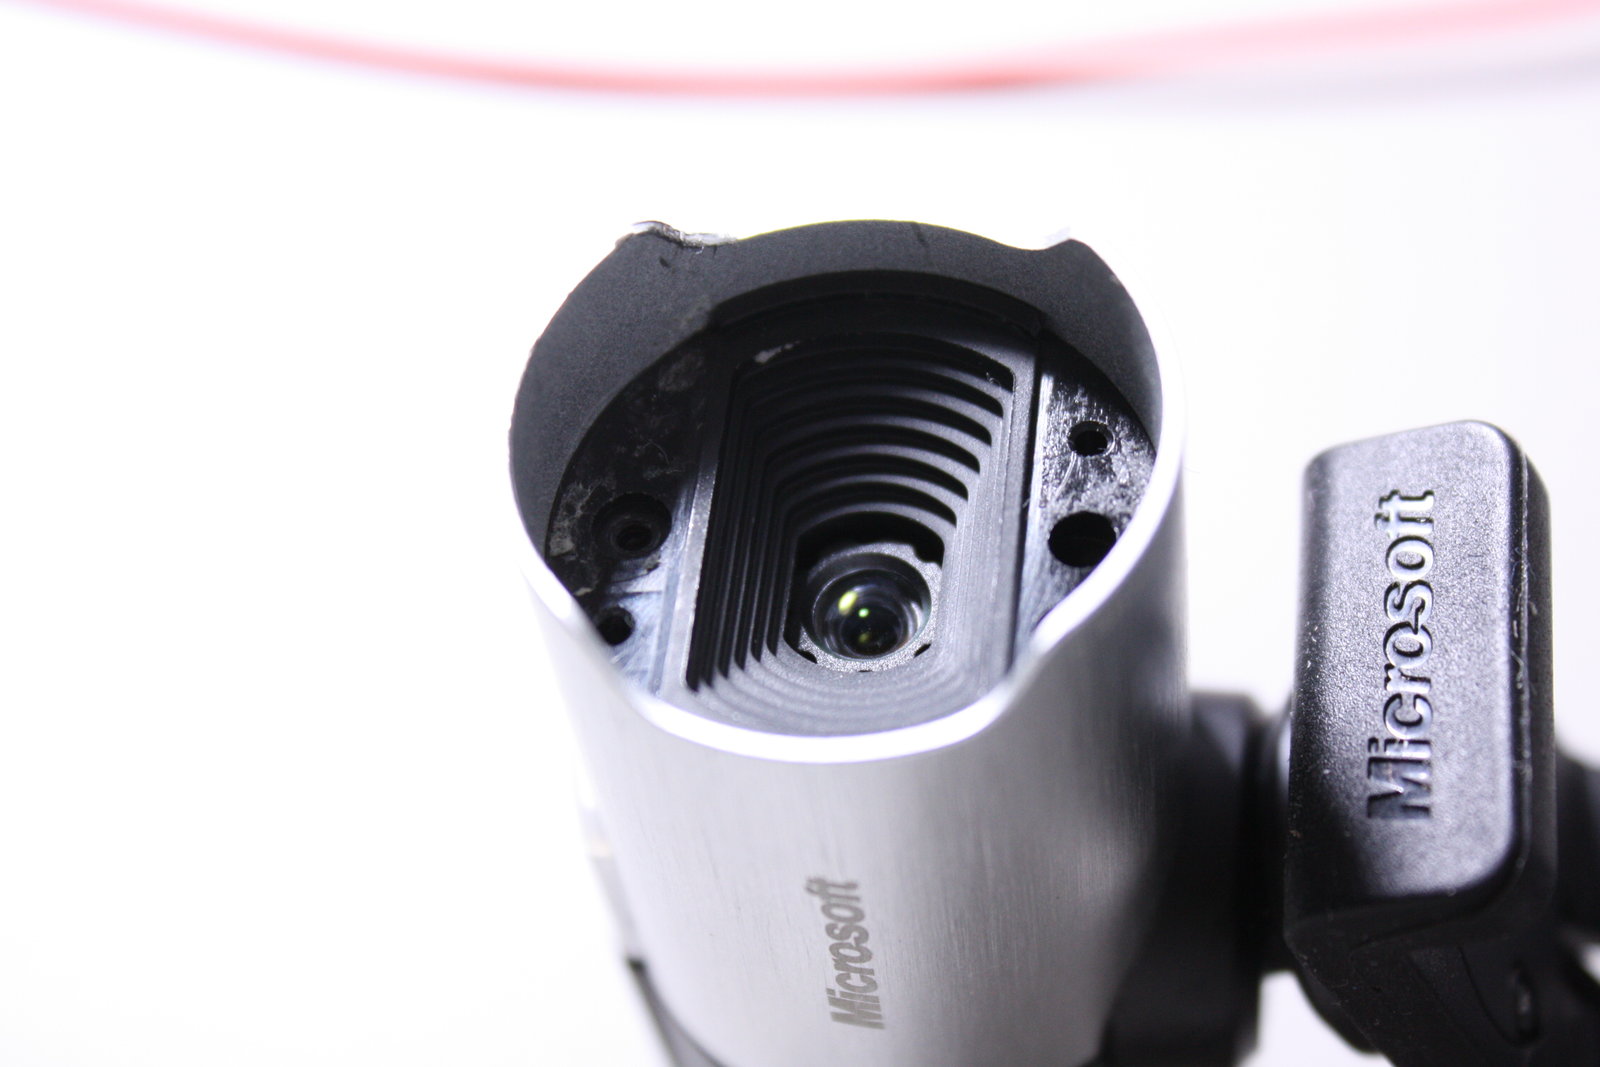
Then the two screws under the lens frame can be removed.
On the rear the plastic cover can be pried out via the small hole on the underside (e.g. with a small screwdriver)...
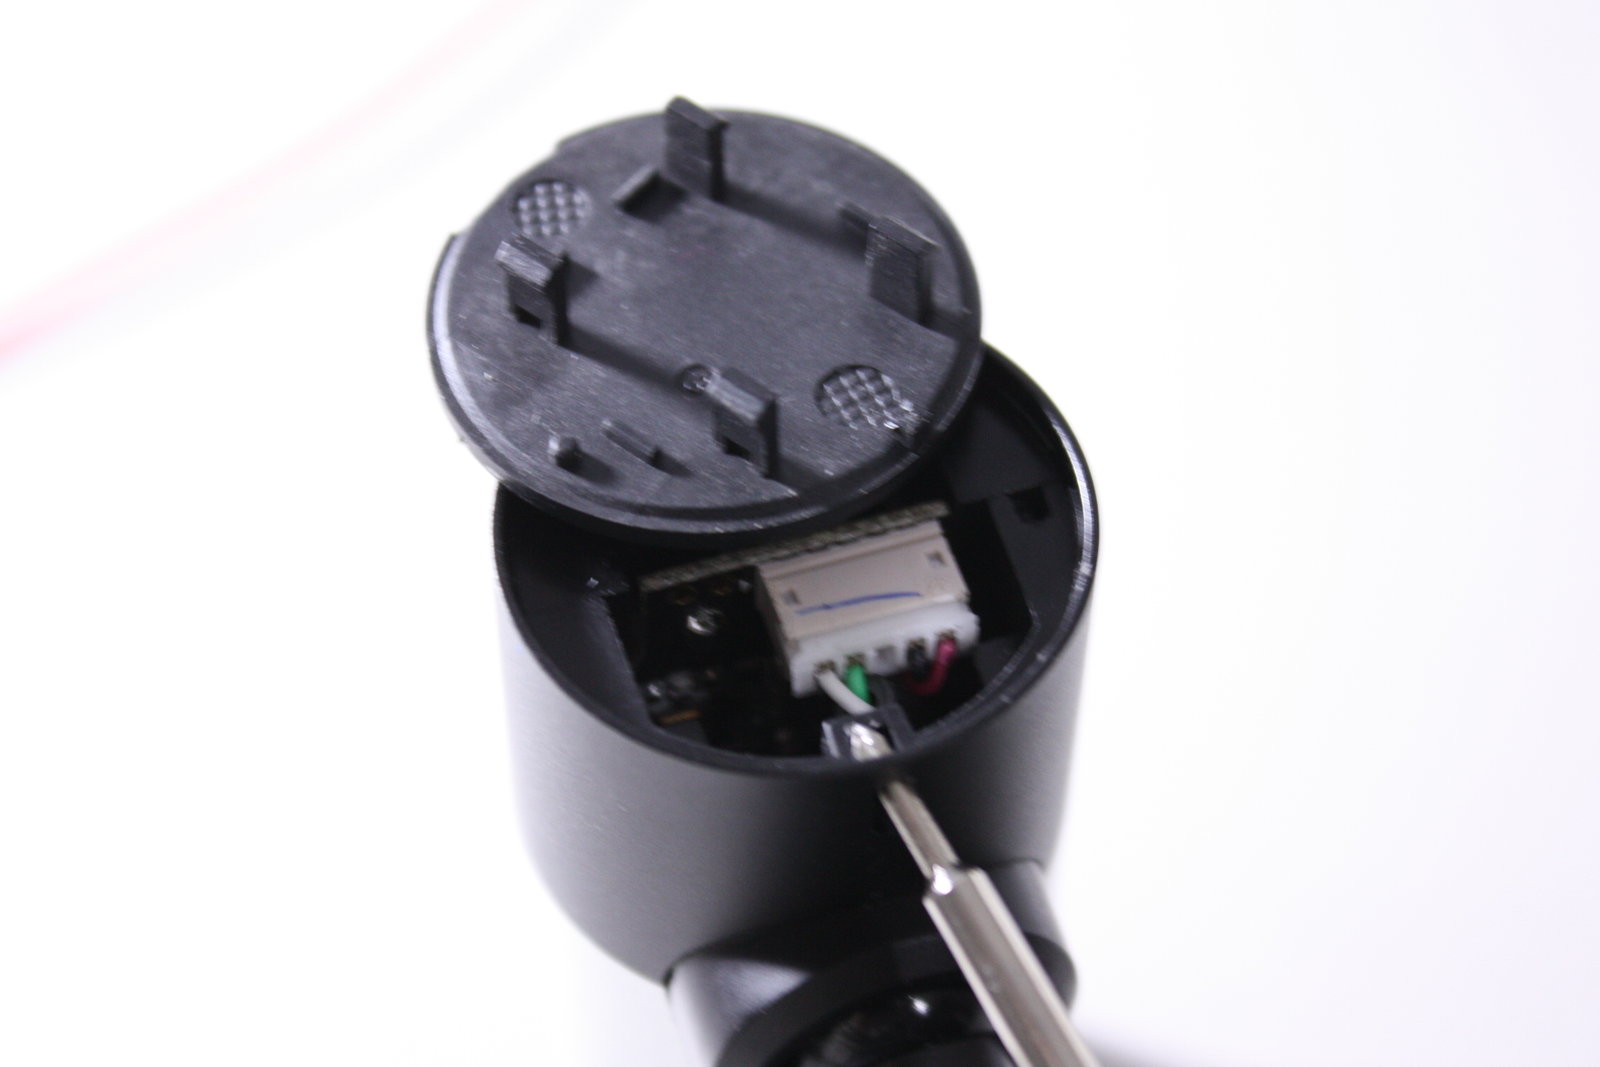
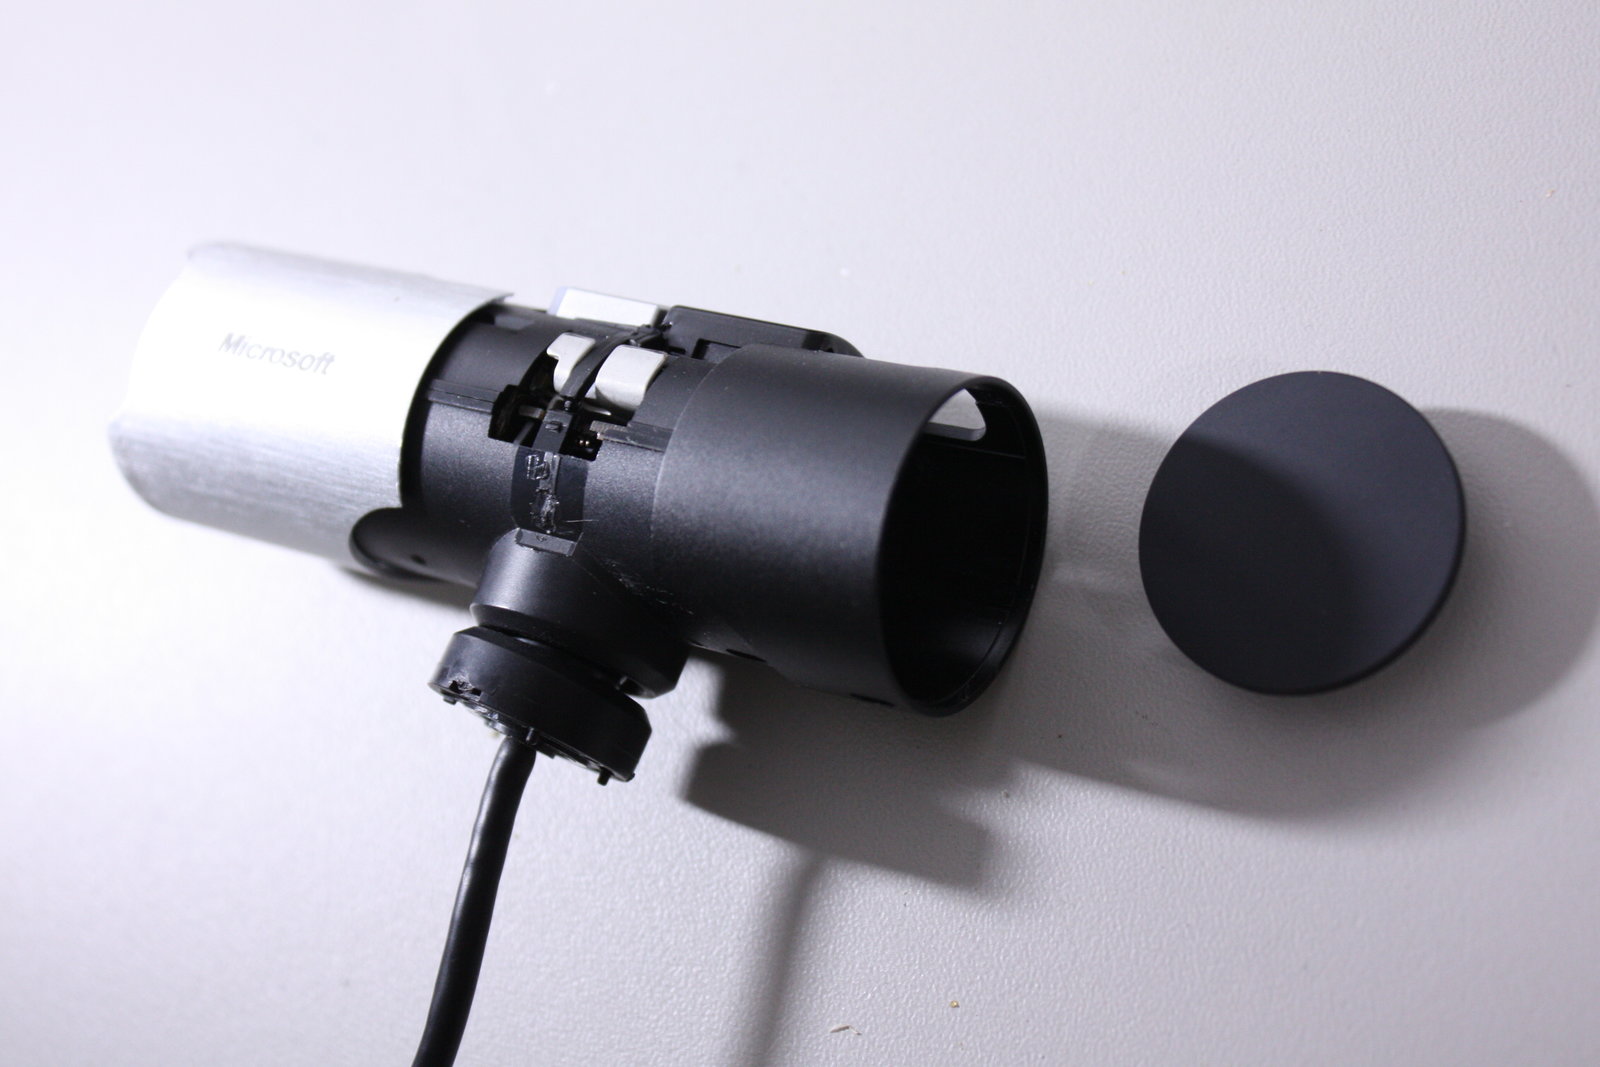
...then the metal sleeves on both sides can be slided off.
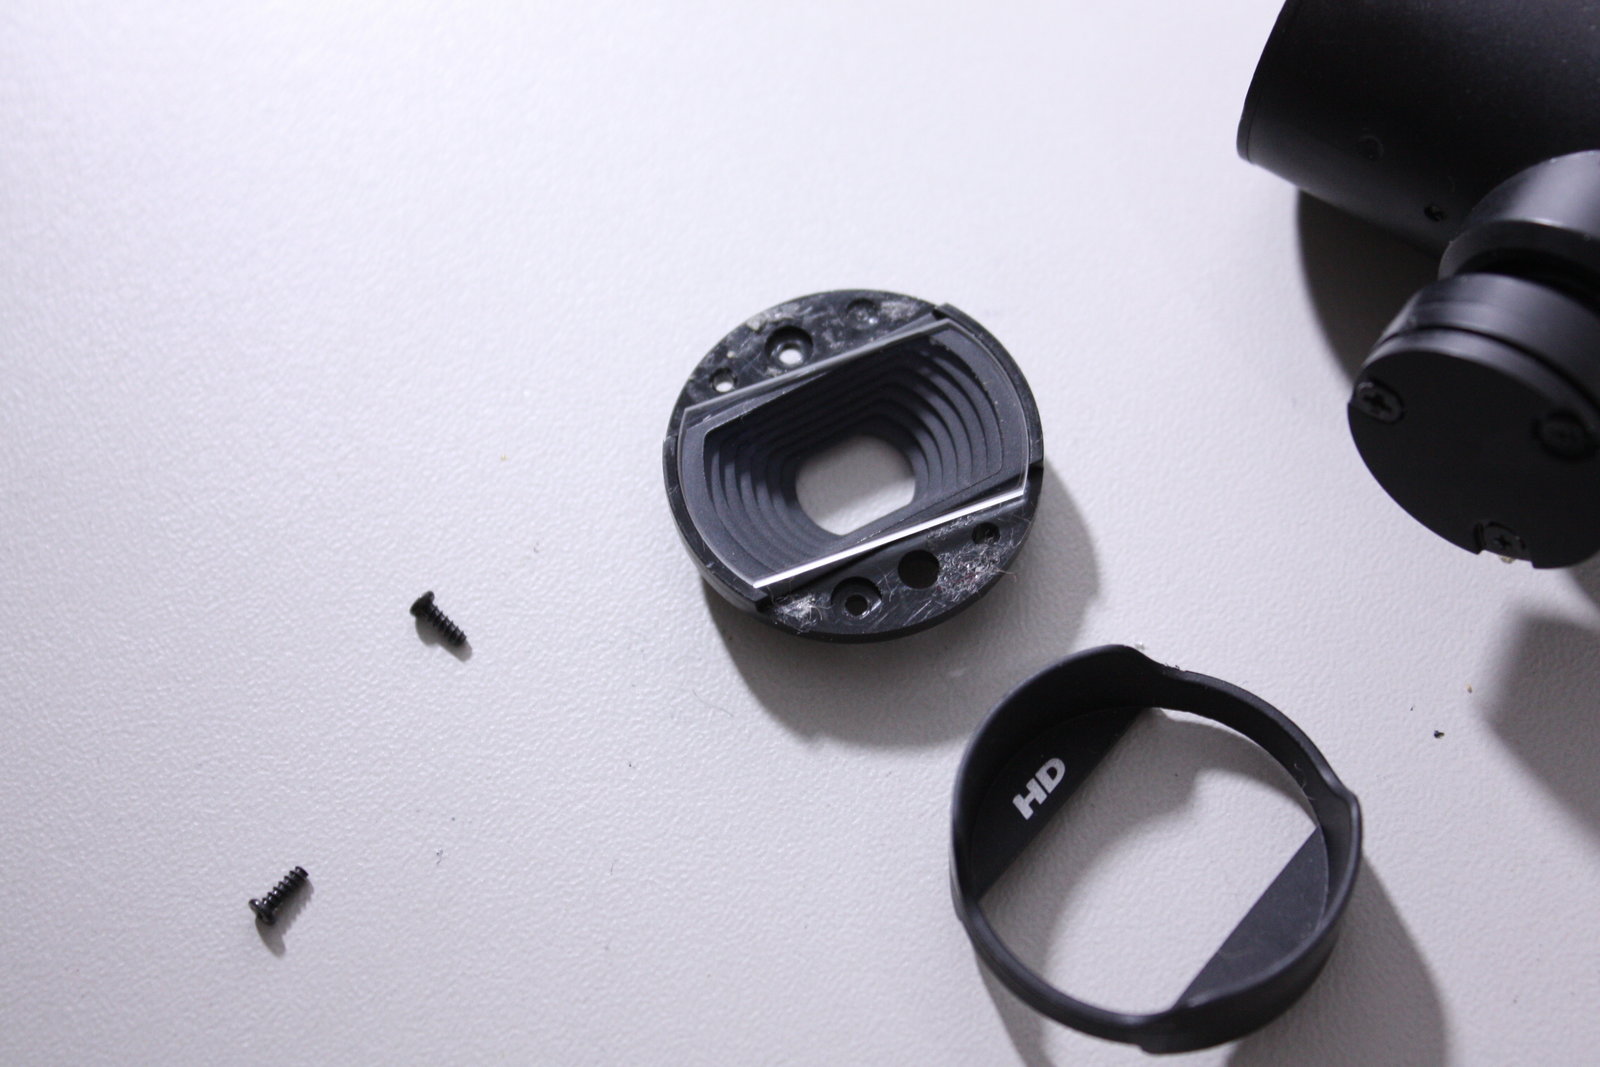
The microphone cover can be lifted away from the sides...
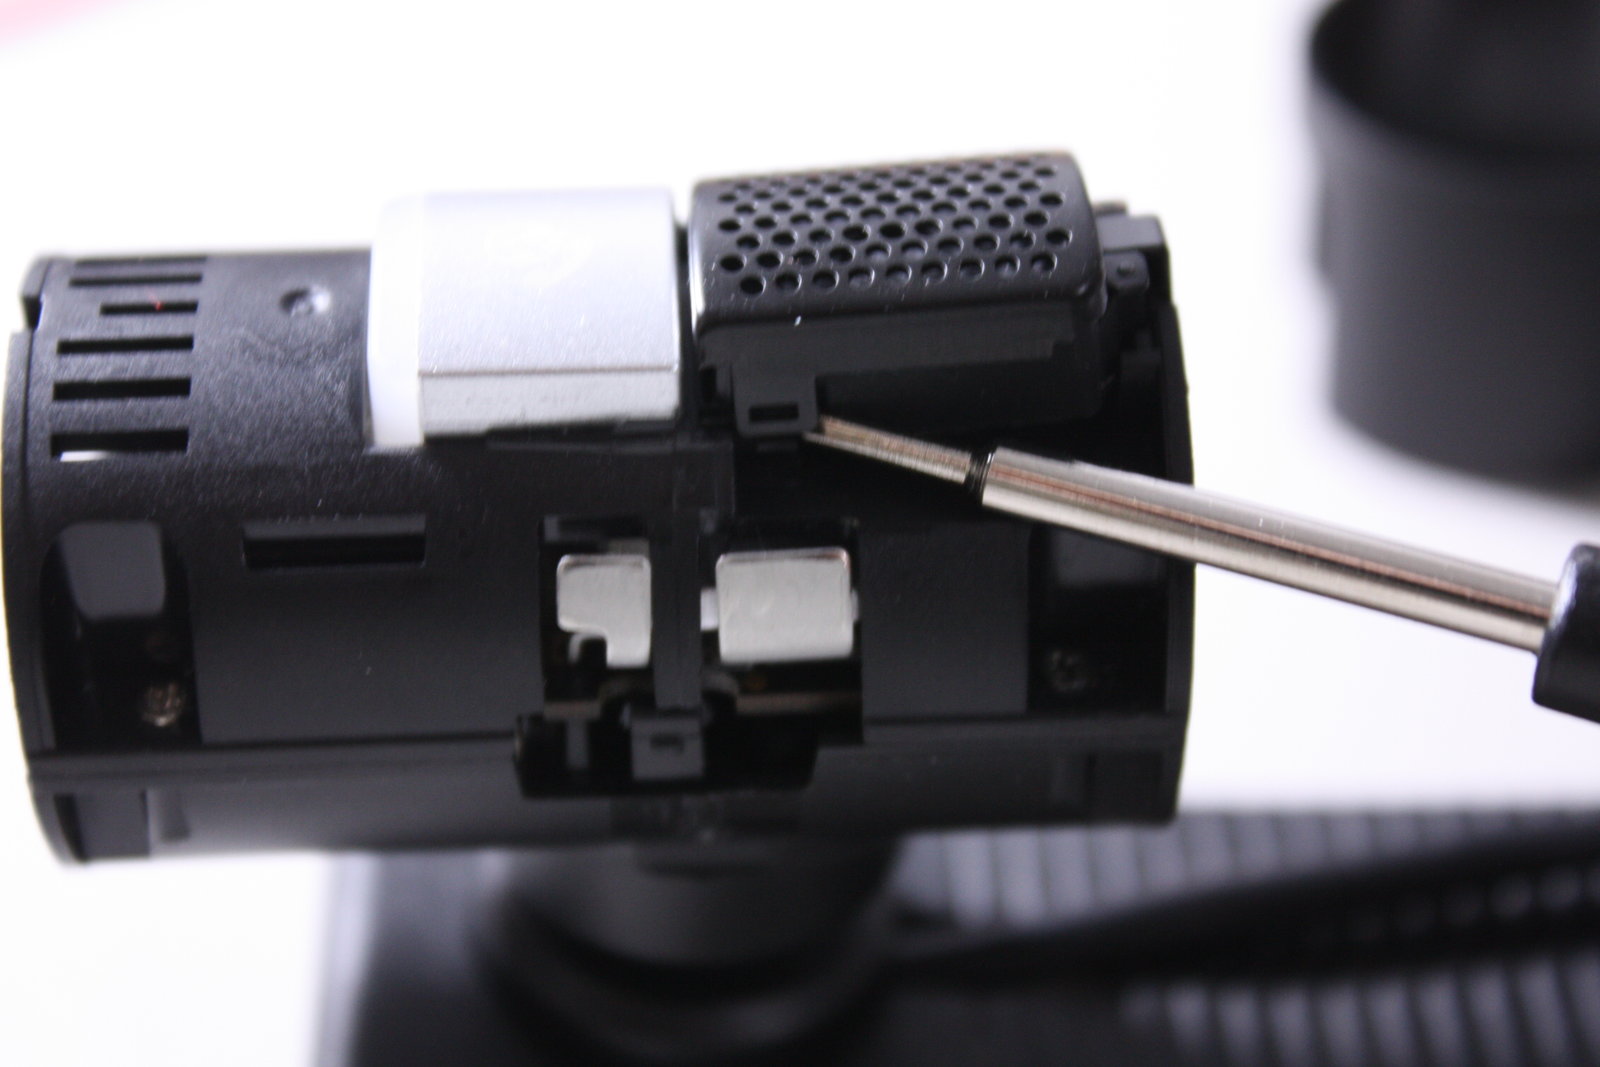
...and immediately the microphone comes out and can be deconnected.

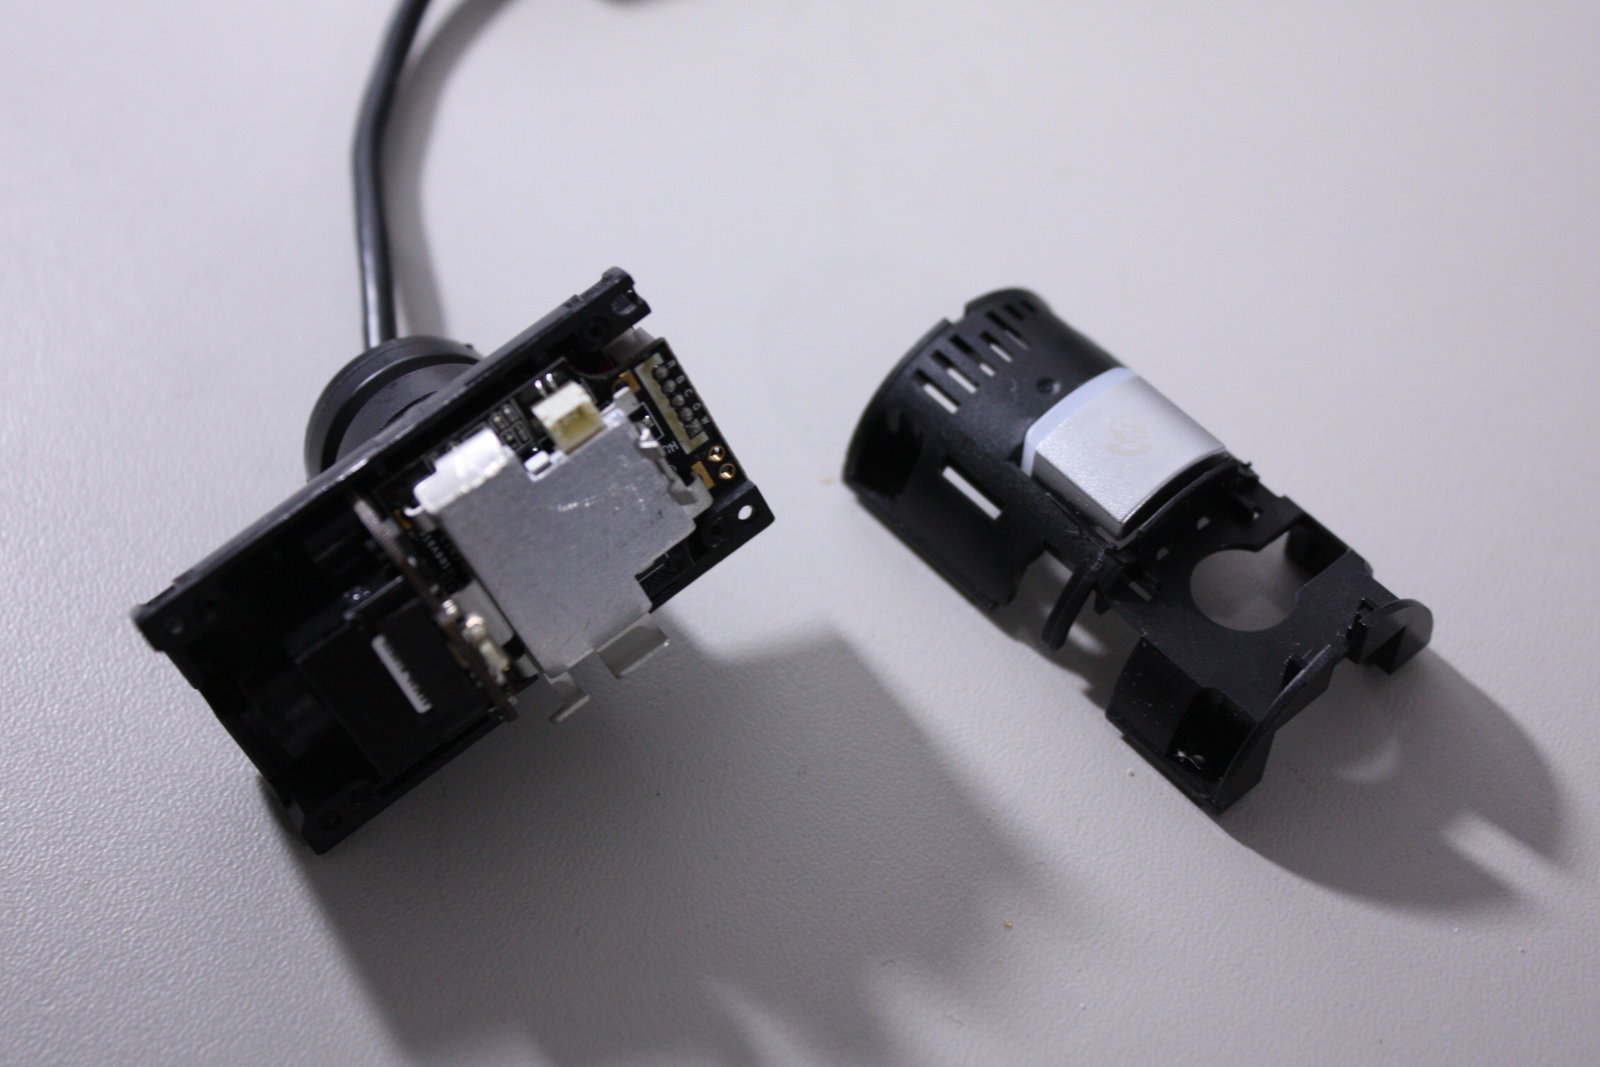
Four screws - one on each side - hold the camera housing together. After removing them, the housing can be taken apart and the camera PCB can be lifted out and deconnected from the USB cable.
Desoldering EEPROM
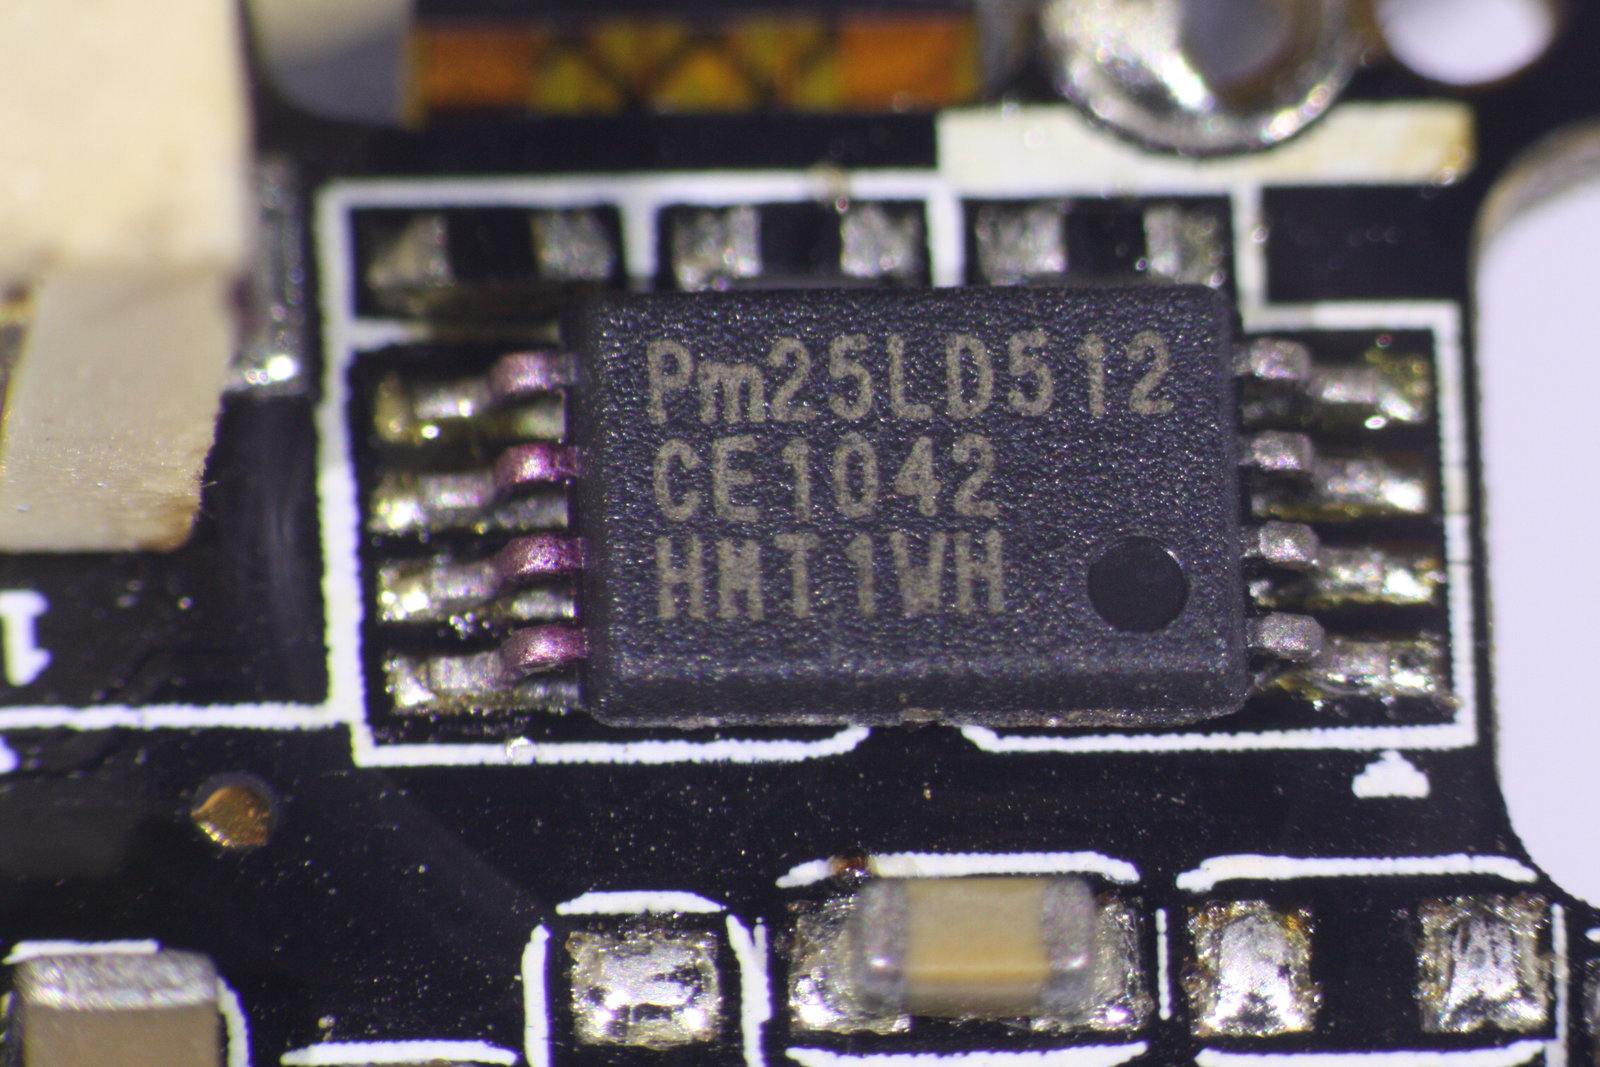
The cam´s EEPROM is a 64K PM25LD512 in a 8-pin TSSOP housing - a pretty small chip located on the underside of the camera´s main PCB.
It could be desoldered easily with a directed stream of hot air at 320 °C (to prevent heat damage to the plastic parts of the lens/sensor module, I deconnected this PCB).

Acquiring the right firmware
I downloaded the MLS firmware from the corresponding Microsoft support homepage (a file called StudioFW1031.exe - the latest firmware file StudioFW1033.exe should be okay, too, but yet I opted for the older one). Then I extracted the content from the file (in my case under Linux) and got the following folder structure "StudioFW1031/.rsrc/FIRMWARE".
In the last folder "FIRMWARE" were two 64K files -> "600" and "601" - both files were binary only but according to a "cat" and "diff" identical. Thus, I went with the "601" and renamed it to "601.BIN".
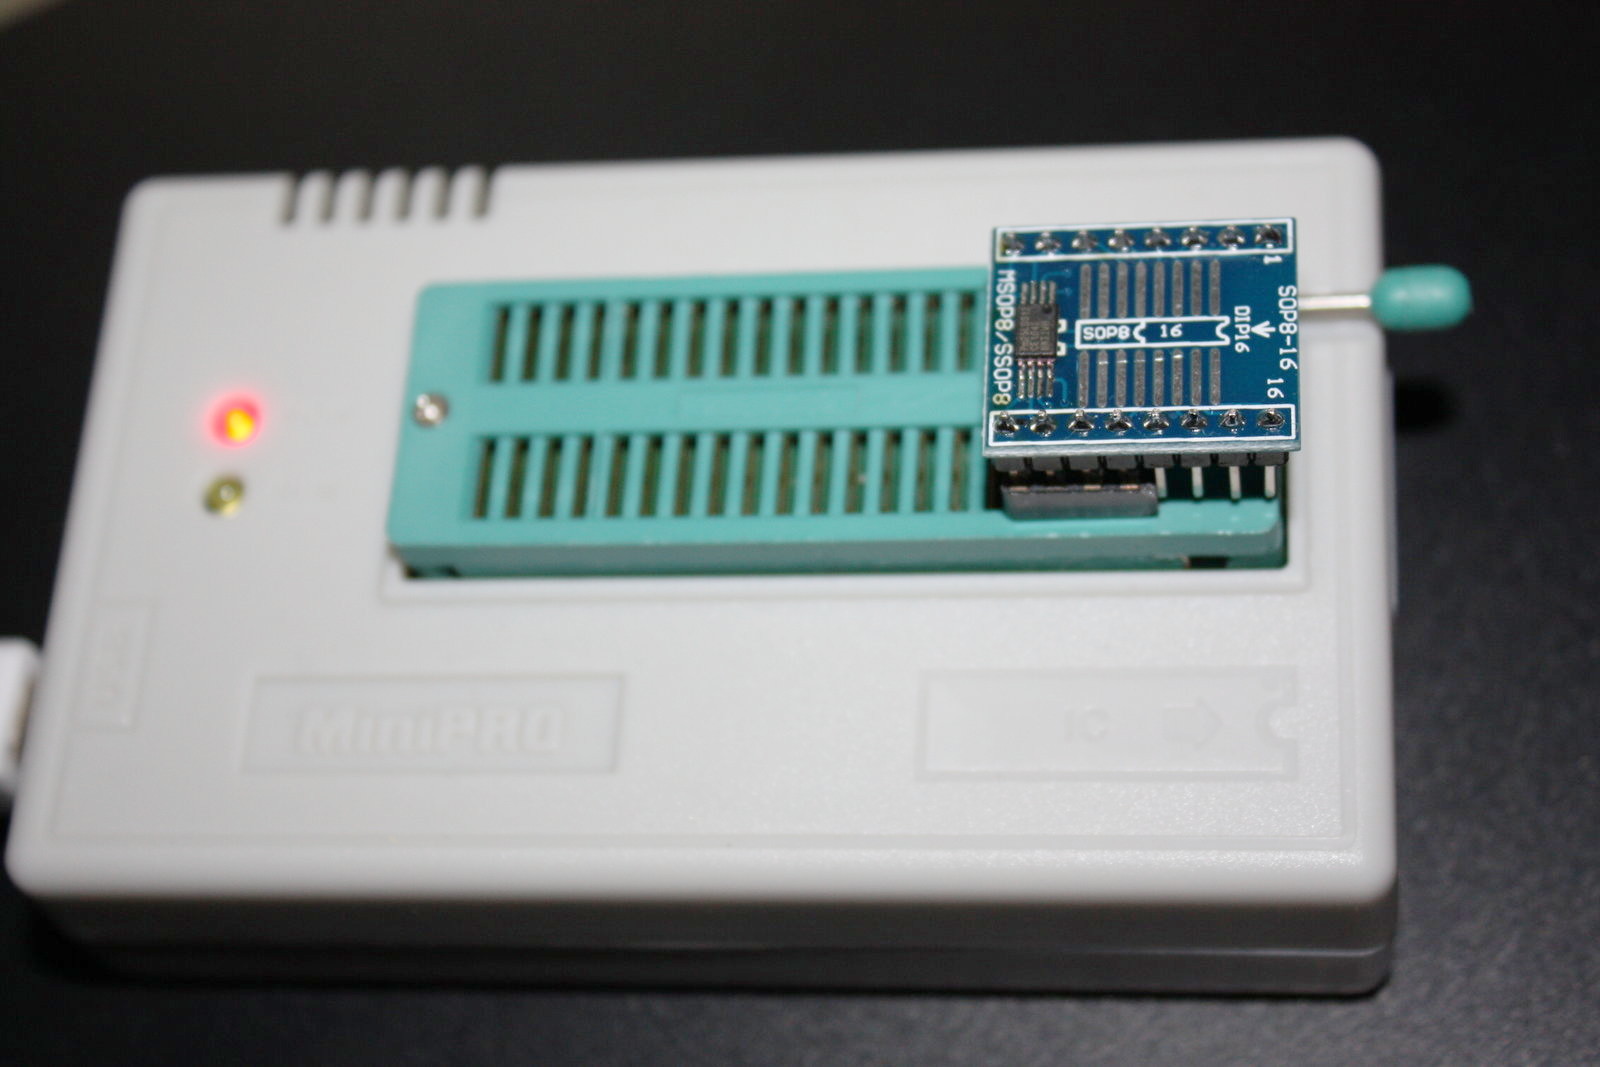
Flashing the PM25LD512
I soldered the PM25LD512 to the corresponding MSOP8/SSOP8 adapter PCB that came with my MiniPro TL866A USB EEPROM programmer.
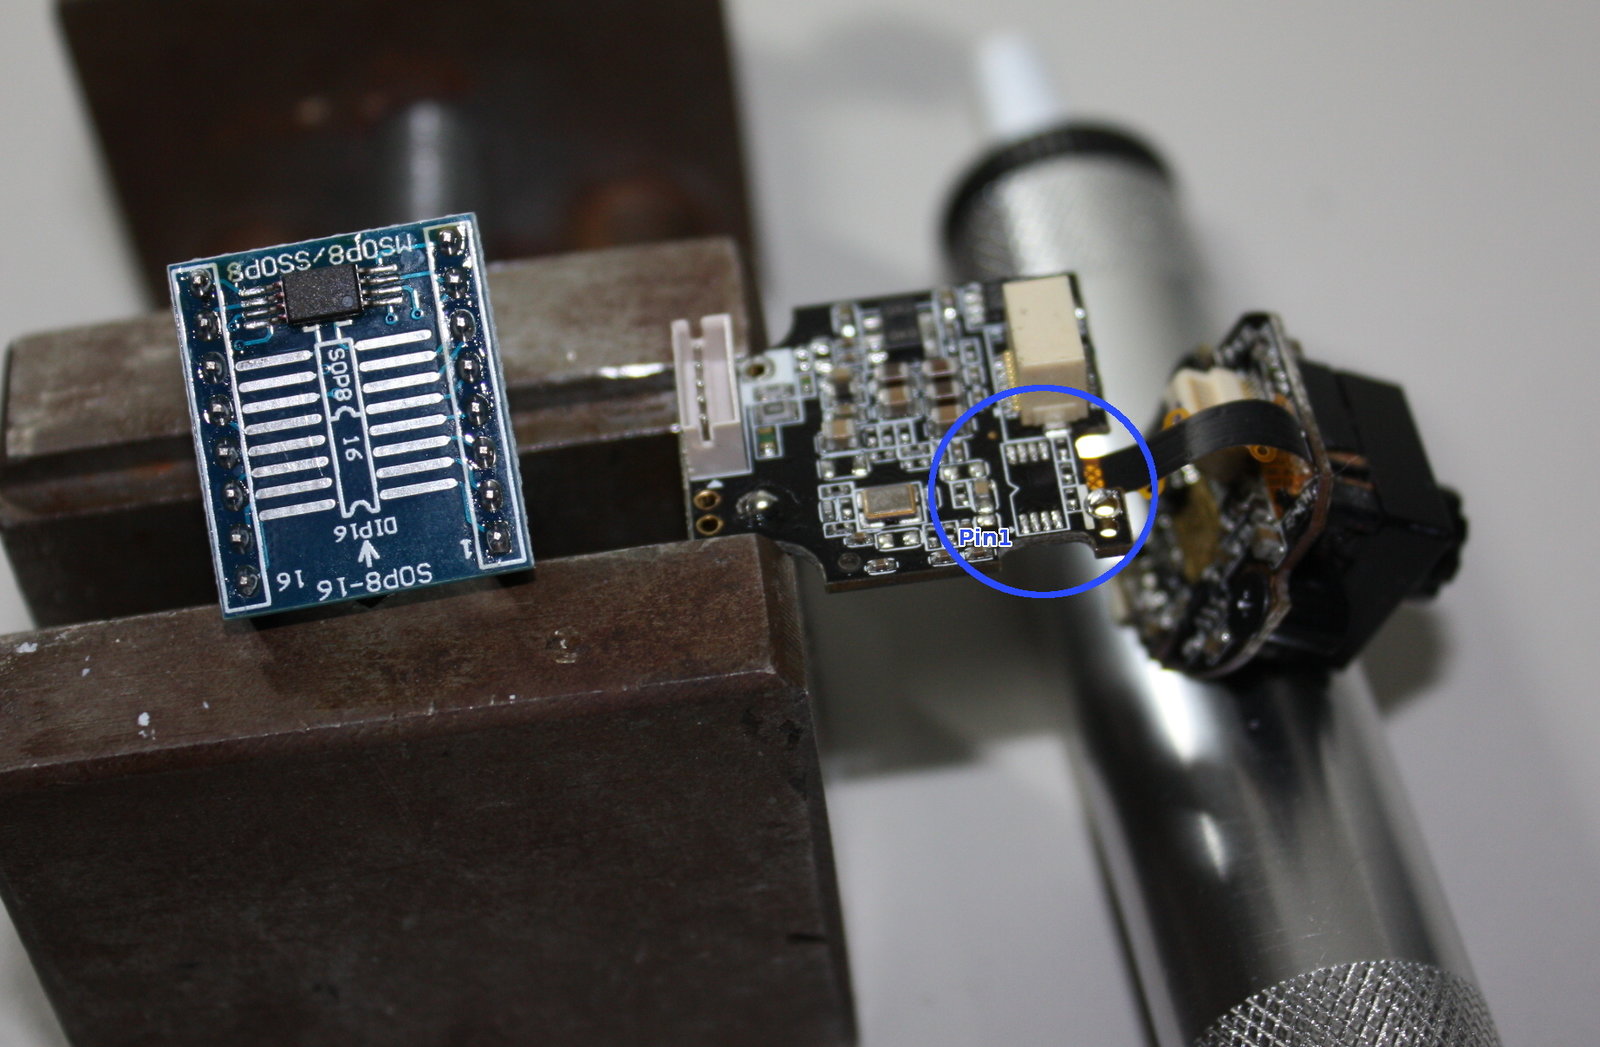
The adapter PCB on the MiniPro´s ZIF socket:
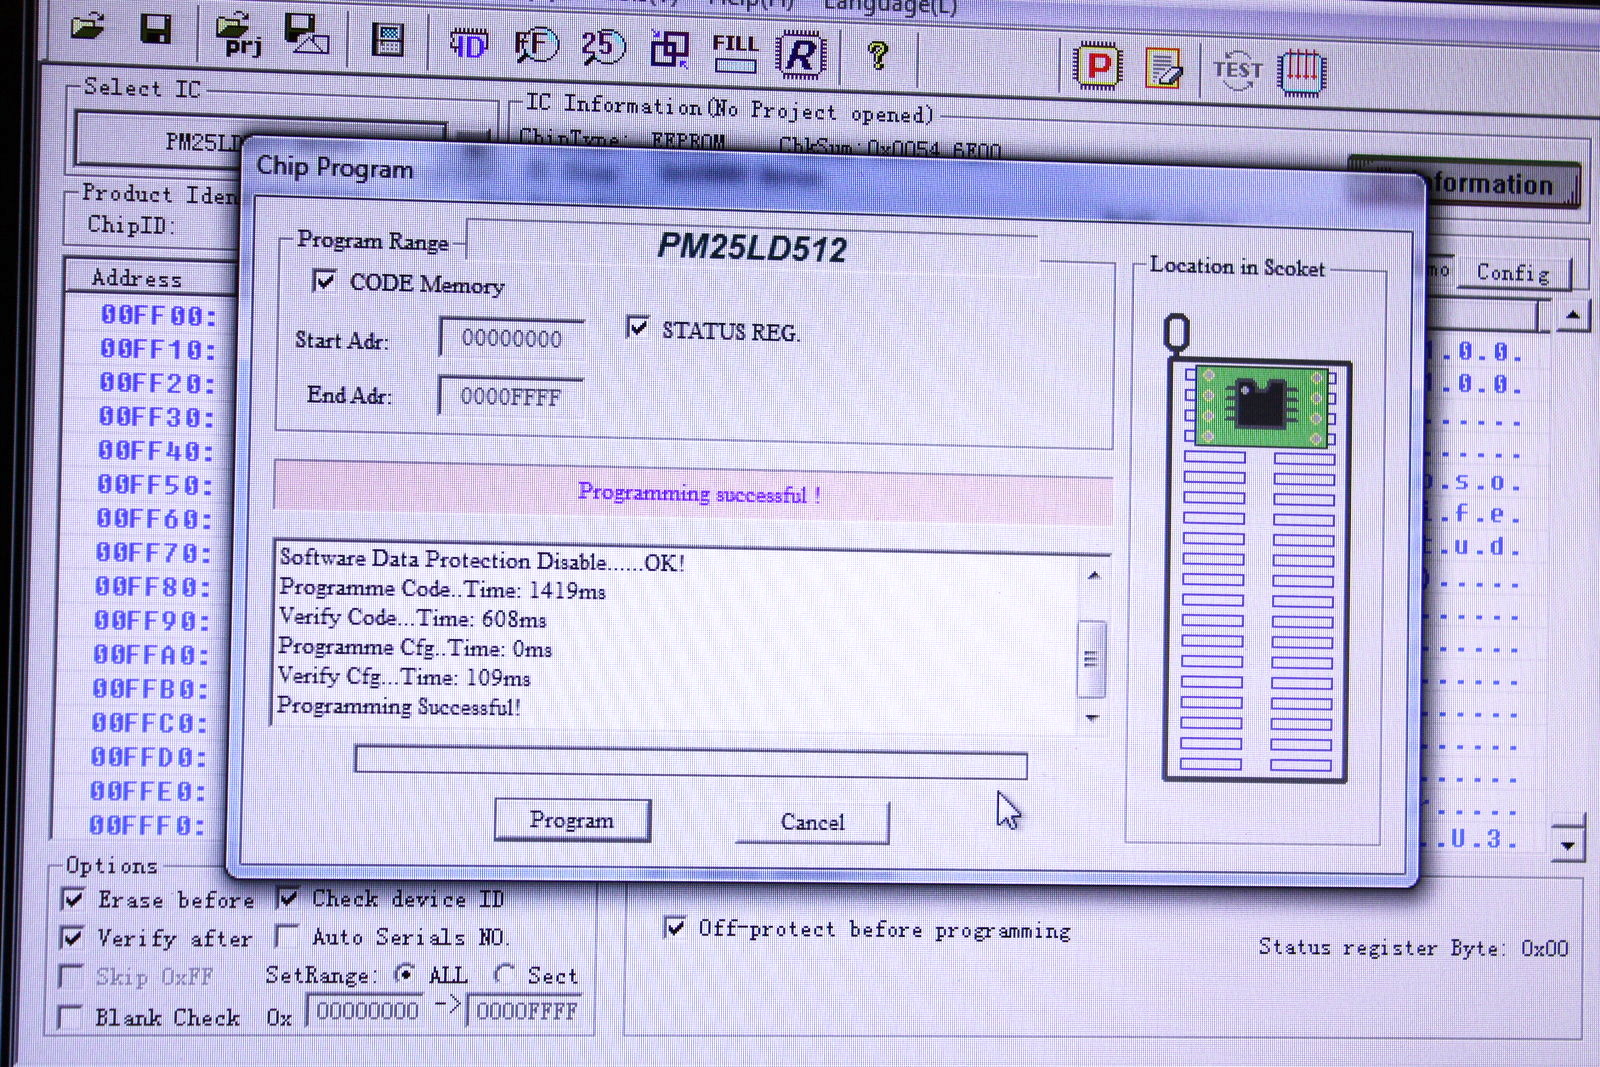
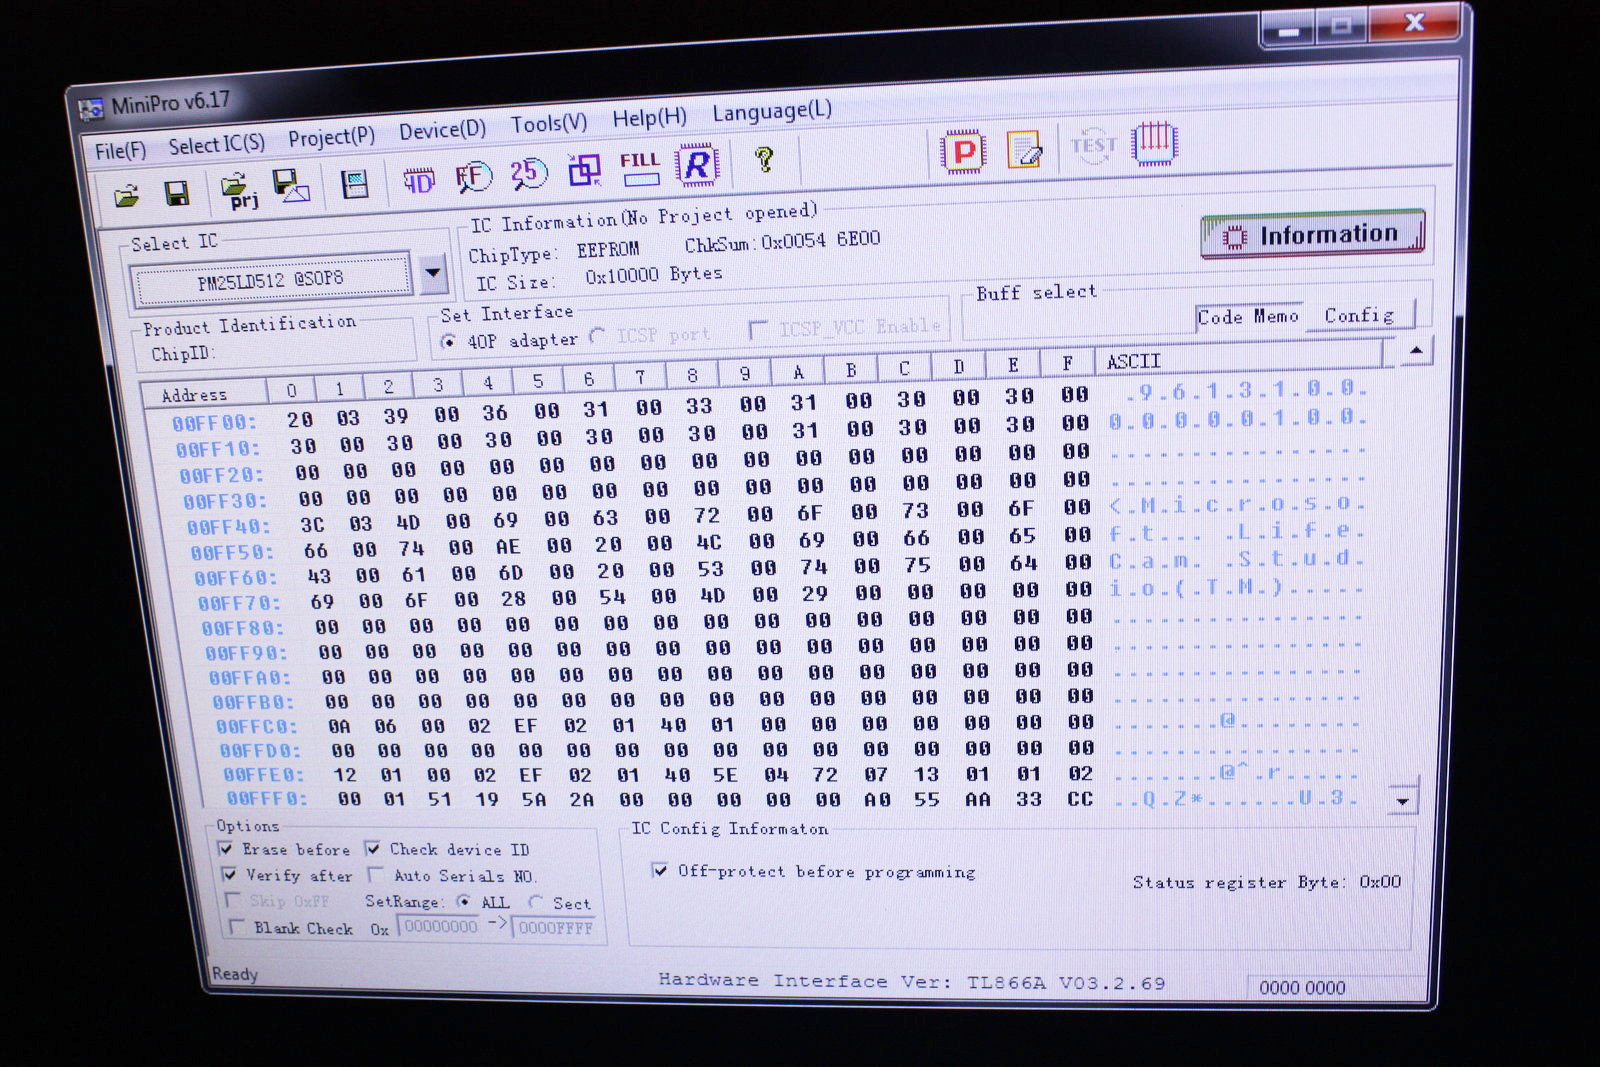
Time to read out the flash content from the bricked camera´s chip:

Apparently, most of the content was zeroed out by the faulty firmware upgrade. Now, I opened the "601.BIN" in the MiniPro´s software and flashed it to the chip:
Reading it out again, showed content that made much more sense:
In the following I soldered the flash back on the camera´s main PCB and gave it a try:

Voià my Dumont pincers live in HD:

I reassembled the cam afterwards and upgraded it to the latest StudioFW1033 firmware without further problems. Hopefully, you can revive your Lifecam Studio, too. Feel free to link this blog article or to drop me some lines if you found it helpful.
greetings noq2
Comments