The first Thinkpad X1 Carbon from 2012 was one of the first Ultrabooks (according to Intel´s spec requirements). It featured a carbon fiber / magnesium case which allowed for a very flat but also light and durable design. There´s a drawback however, the battery cannot be changed without opening the device. And some replacement parts aren´t too cheap here, e.g. the new and genuine Lenovo battery was 150 € - screen and mainboard are even more expensive.
As I liked the general built quality of the device, I did a short howto, on how to replace the battery (you will see that you can use this guide for replacing almost any other part in the device, just read on...).
Opening the device
-
Before servicing, the battery should be deactivated in the Thinkpad BIOS (use F1 to access it; I have no photograph here, as the battery was depleted / dead in this unit - not what you might wish to find in a 1900+ €s laptop after less than three years).
-
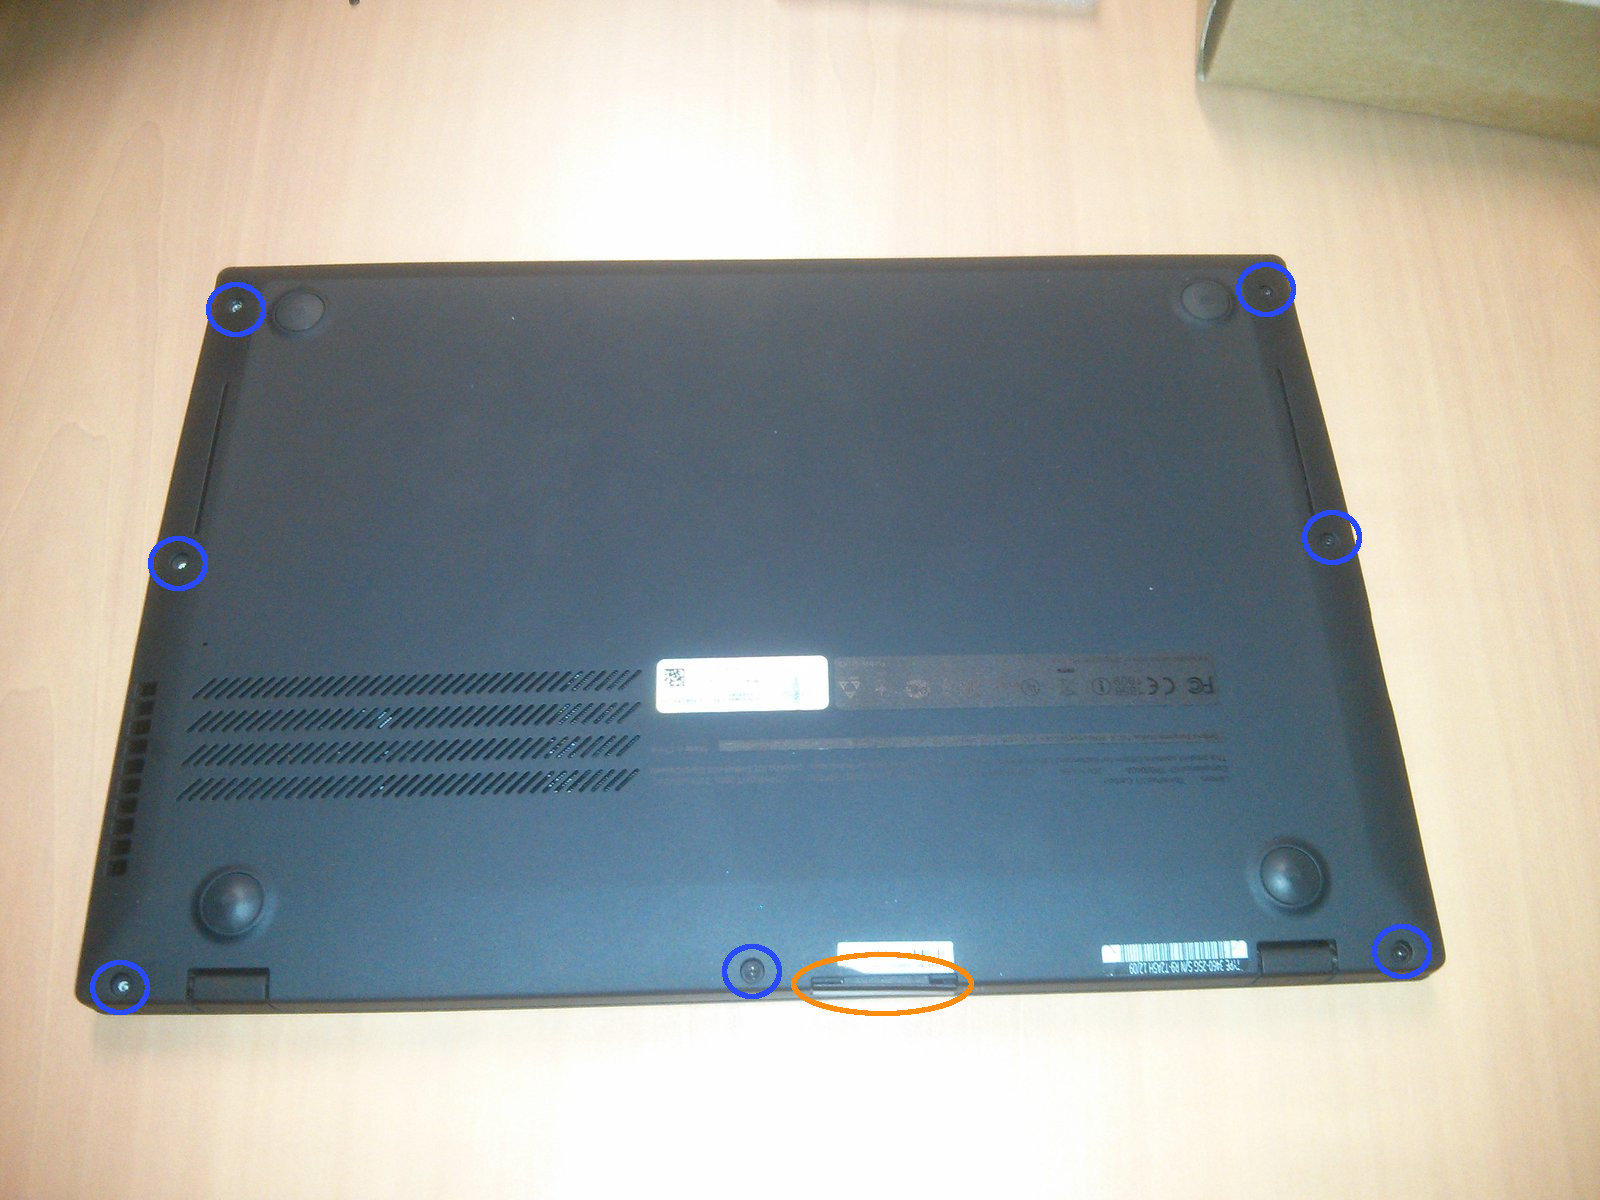
Next, I removed the SIM card under the small plastic lid (orange circle), then seven identical black screws (blue circles).
-
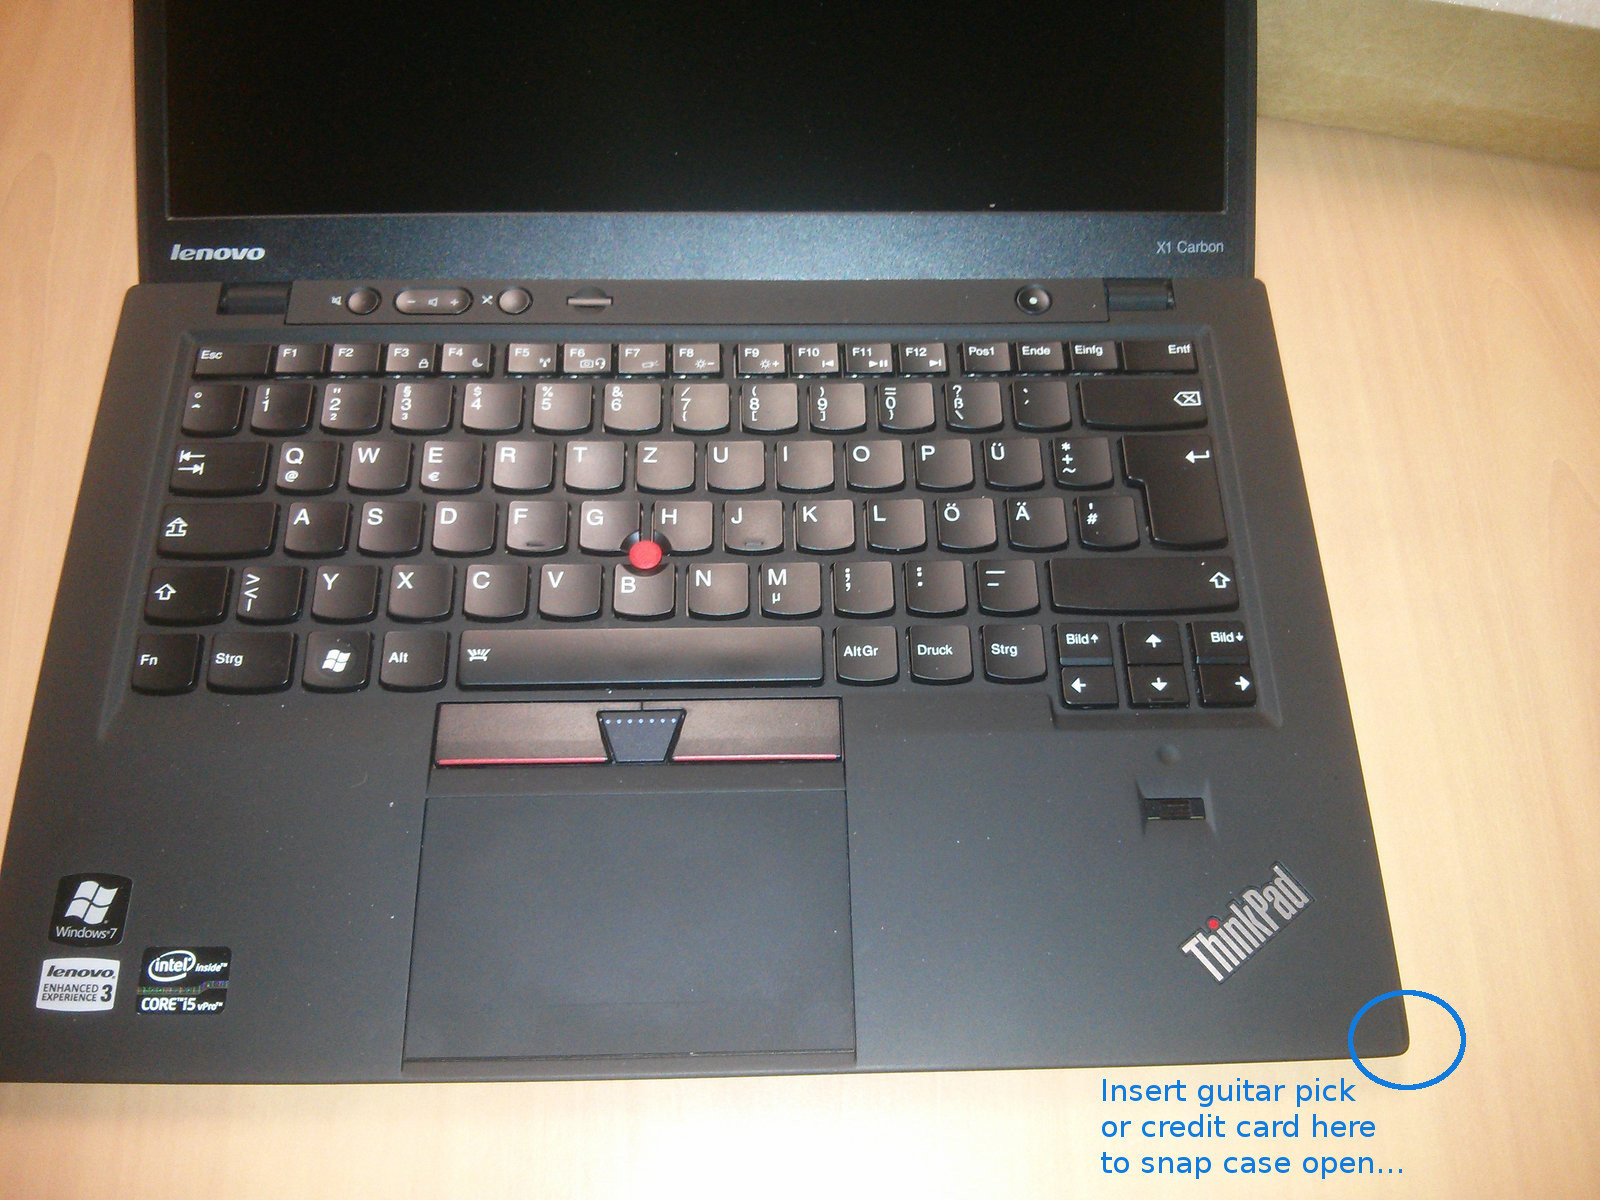
Then I turned the unit around, inserted a guitar pick under the upper case lid and worked it around to snap the keyboard/touchpad unit (= KTU) off (check this grainy detail shot).
-
After raising the KTU a bit the keyboard connector becomes visible and can be disconnected (pry it up gently - don´t use too much force here...).

-
Yeah, I somehow like this laptop: After removal of the KTU you have access to most serviceable parts - I noted them on the picture below.
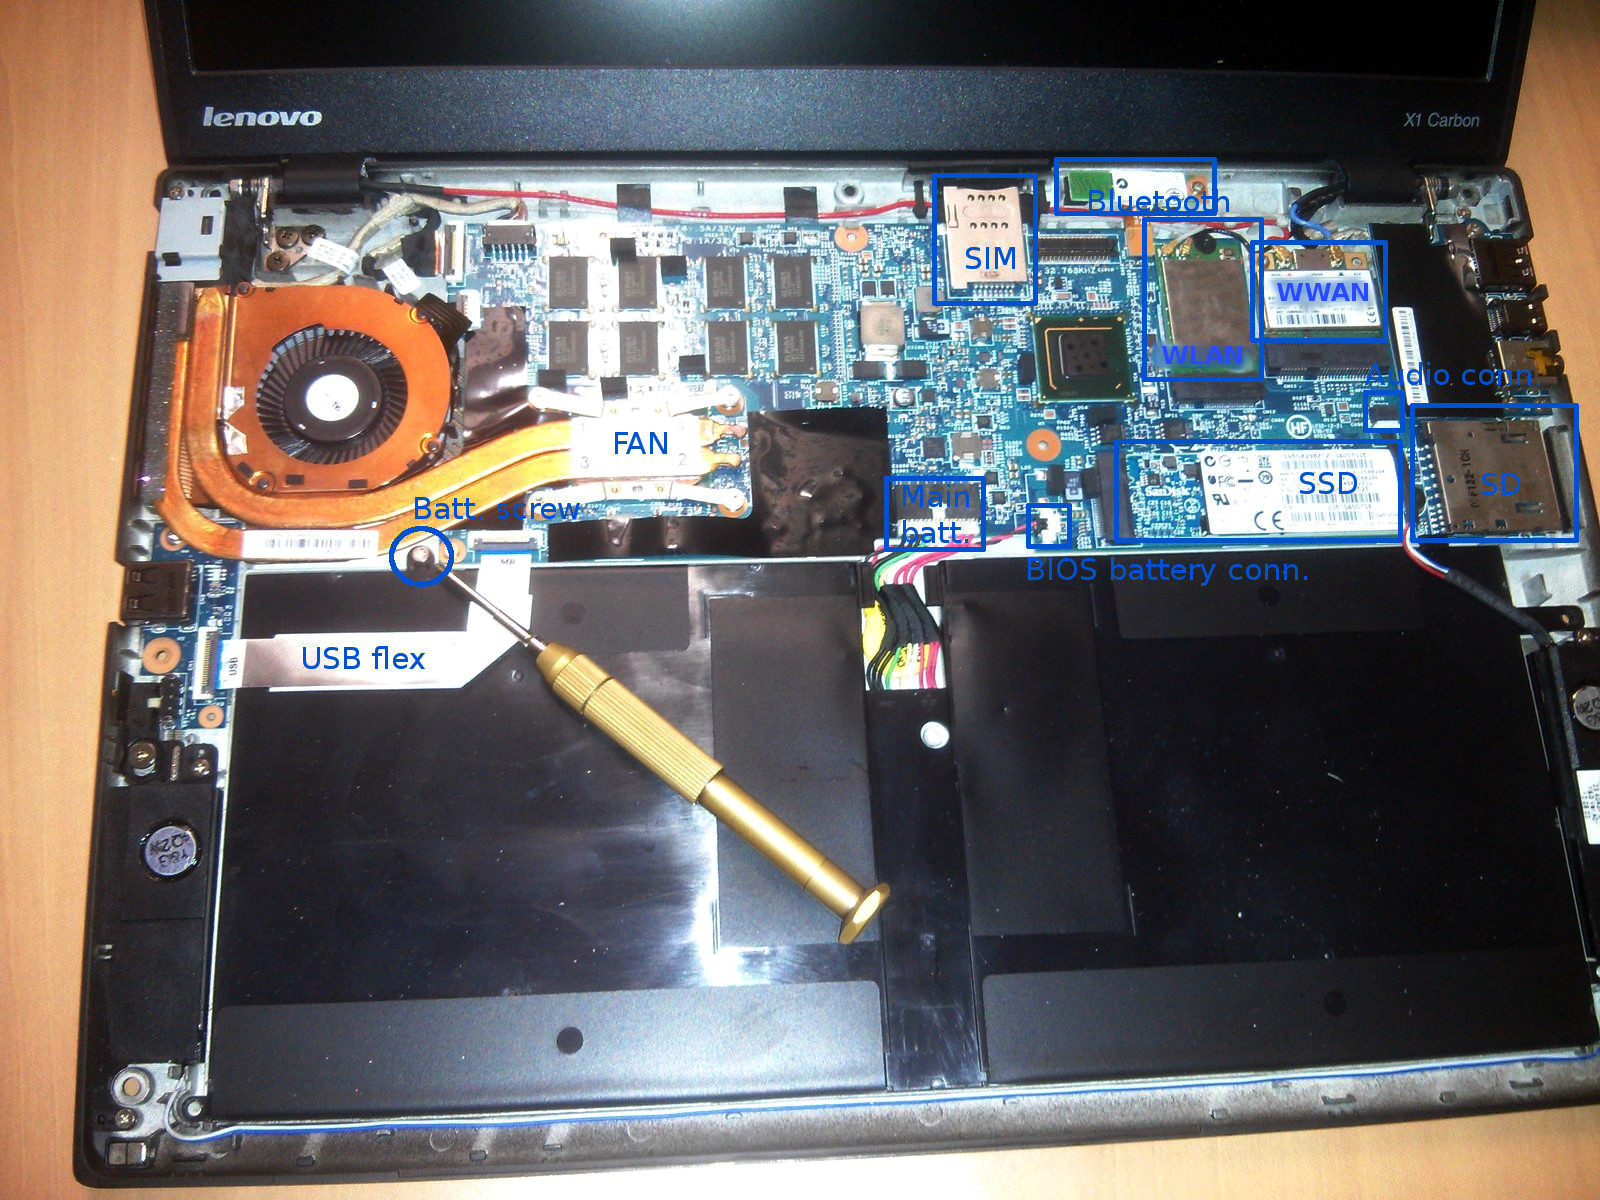
As you can see, most parts like the Bluetooth, WLAN and WWAN modules or the SSD drive can be swapped out by merely removing single screws which hold each module in place.
Replacing a noisy / rattling fan is not a problem, too. But you should apply some new thermal grease to get the heat from the CPU away.
In case your whole unit has died without the chance of repair, it is also possible to insert the mSATA blade SSD to a standard SATA-adapter (check ebay...) and recover your personal data without the expensive help of a data recovery service (drop me some lines, if you should need further assistance here 8-).
-
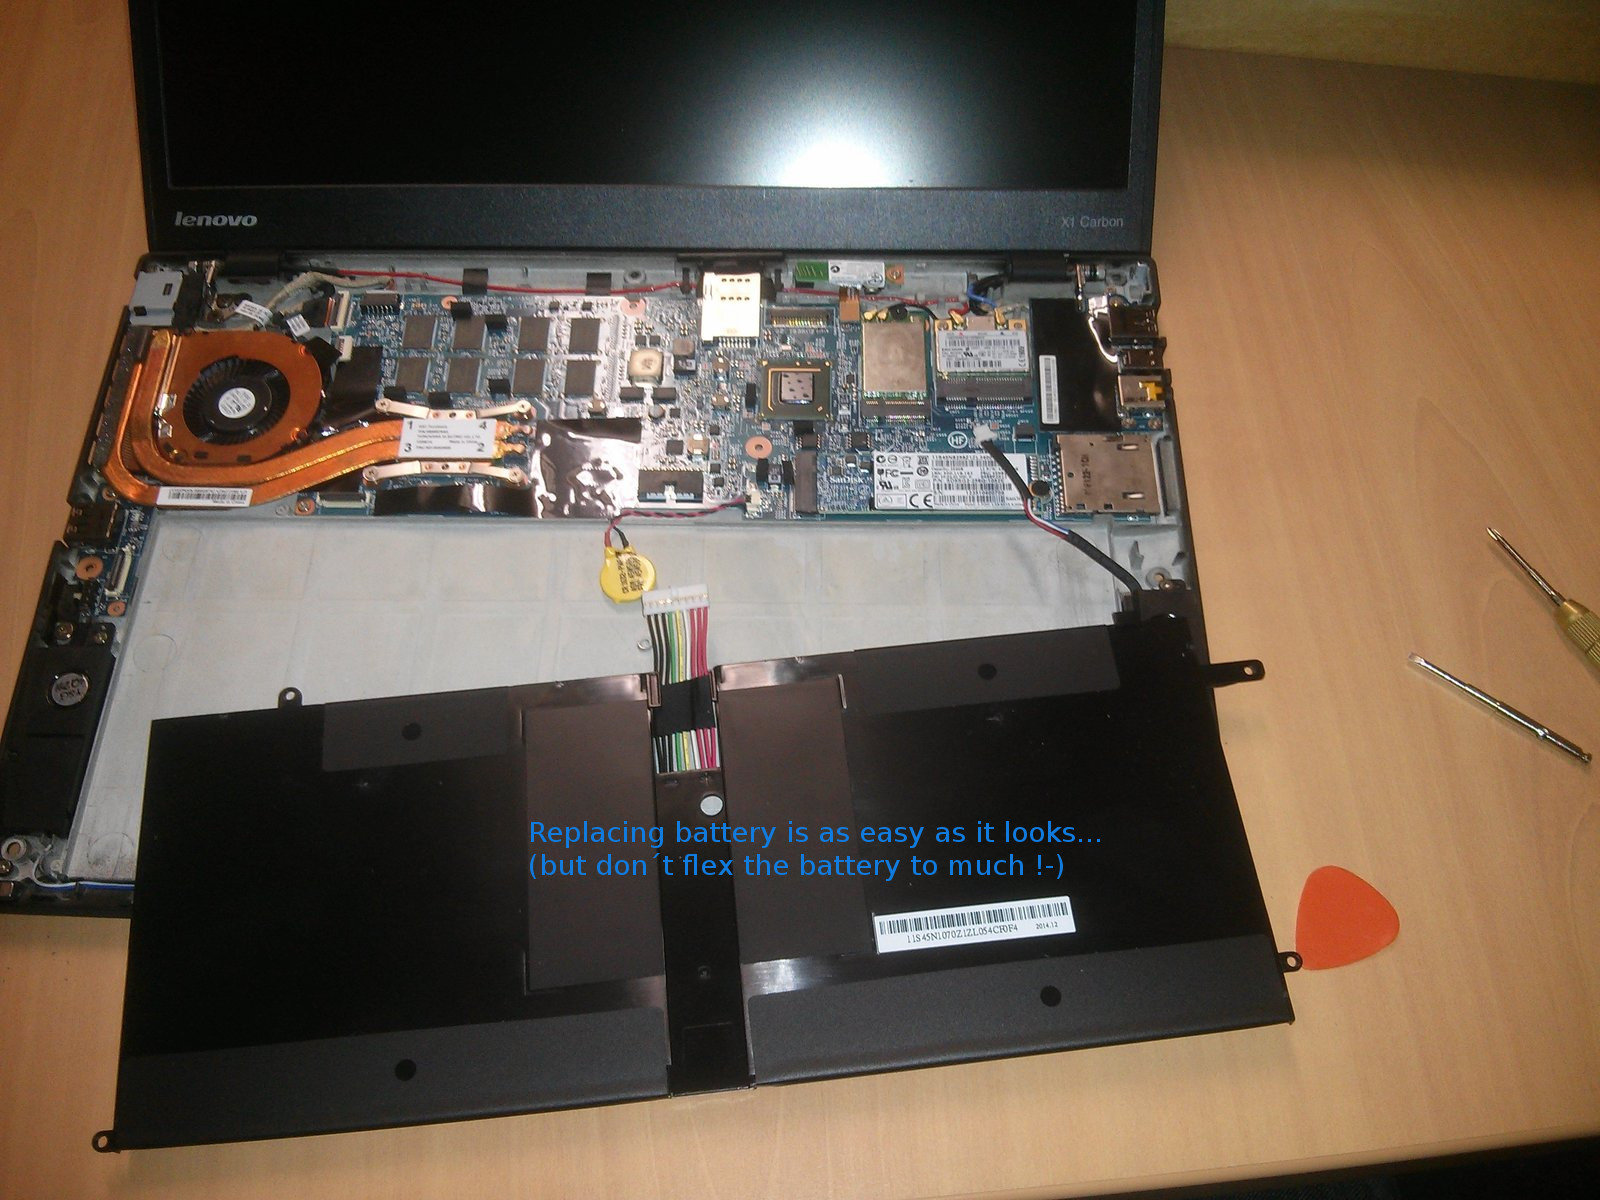
Oh, I forgot, this was about changing the battery...well, to do that, just remove the single screw which holds it, remove the USB-port flex cable and the battery connector and finally lift the battery out of the case.
Getting everything together again shouldn´t be a problem - just put and connect parts back in place and close the unit again. In case info provided here was helpful for you, feel free to comment,
greetings noq2
Comments