Coreboot (CB) is an open source BIOS replacement that really needs and deserves a lot more attention by the public. Here are some reasons why:
Again: It´s open source
It allows for faster hardware initialization and thus significantly faster boot times (can be very fast combined with recent SSDs)
It allows you to bypass nasty device whitelisting issues (typical for Thinkpads, sadly)
It *can* make your laptop support more RAM and newer add-in cards (ac-WiFi, LTE-WWAN,...).
It *may* give you a more secure machine and better privacy (e.g. regarding BIOS spyware and potential backdoors).
Due to the fact that it doesn´t come preinstalled and the process of setting it up on your hardware is quite poorly documented, CB remains largely unknown outside of the hardware-hacking / BIOS-modding scene (in addition, Intel started blocking the use of alternative firmware since implementing Boot Guard :-/).
Thus it is definitely time for a howto on the full procedure "to coreboot" a Thinkpad, in this case on the example of a Thinkpad X230...
Compiling a coreboot image for Thinkpad X230
Attention / Disclaimer: The step-by-step howto below can brick your Thinkpad and CB on the X230 - at least in its current form - comes at a cost because...
you will lose any kind of warranty by following the procedure.
you will lose the F1-BIOS including all its options like setting the time, configuring boot options and so on - it will all be gone.
you *might* encounter further trade-offs while using your X230 (e.g. during booting or with external displays).
I compiled CB on a venerable Thinkpad X61 on Ubuntu 14.04 v3 LTS with kernel 3.13.0-77-generic. But the following procedure should at least be possible on any Ubuntu 14.04 LTS system.
Prerequisites
First, start with getting your OS up to date:
sudo apt-get update && sudo apt-get upgrade -y
Get git and other dependencies (if you don´t already have them):
sudo apt-get install bison clang flex git libncurses5-dev m4
Get coreboot:
git clone http://review.coreboot.org/coreboot.git
Enter the coreboot folder...and get the "blobs" (not a disease - just proprietary, closed source stuff *nooo...* okay, some kind of disease):
cd coreboot && git clone http://review.coreboot.org/p/blobs.git ./3rdparty/blobs
Configuring coreboot for the X230
Generate a config-file for compiling the CB image:
make nconfig
Seabios as a payload (basically an ultra-simple boot menu) will give you a simple boot menu. Credits for the overview below go to Eric Holzbach who kindly allowed me to use this passage from his own blog -> Thanks you, Eric):
    general  --|
               |-[*] Compress ramstage with LZMA
               |-[*] Include the coreboot .config file into the ROM image
    mainboard -|
               |-Mainboard vendor (Lenovo)
               |-Mainboard model (ThinkPad X230)
               |-ROM chip size (12288 KB (12 MB))
               |-(0x100000) Size of CBFS filesystem in ROM
    devices ---|
               |-[*] Use native graphics initialization
    generic ---|
               |-[*] PS/2 keyboard init
    console ---|
               |-[*] Squelch AP CPUs from early console.
               |-[*] Send console output to a CBMEM buffer
               |-[*] Send POST codes to an external device
               |-[*] Send POST codes to an IO port
    sys table -|
               |-[*] Generate SMBIOS tables
    payload ---|
               |-Add a payload (SeaBIOS)
               |-SeaBIOS version (master)
               |-(10) PS/2 keyboard controller initialization timeout (milliseconds)
               |-[*] Hardware init during option ROM execution
               |-[*] Include generated option rom that implements legacy VGA BIOS compatibility
               |-[*] Use LZMA compression for payloads
Then save the configuration as the proposed ".config".
Compiling crossgcc
Next, make crossgcc (this step may take a lot of time on slower systems):
make crossgcc
If the command above fails during making the ARM-Toolchain (crossgcc-arm) - just continue with the command below:
make iasl
Then make the ROM image itself:
make
At the end you should see something like "Built lenovo/x230 (ThinkPad X230)" and find a 12M ROM image coreboot.rom in the coreboot/build folder.
The X230 has two flash chips which form a 12M virtual flash chip (8M+4M). As described on the coreboot-x230-guide only the smaller 4M chip needs to be flashed:
dd if=build/coreboot.rom of=x230-4M.rom bs=1M skip=8
After this last step we finally have the desired coreboot image "x230-4M.rom".
Flashing coreboot using "MiniPRO" TL866A EEPROM flasher
There are actually several ways to get coreboot to the 4M flash chip. You can do it using a Raspberry Pi and a Pomona clip or you can use an EEPROM flasher like I did (the MiniPRO by Autoelectric).
This method requires desoldering the 4M flash chip from the board. Thus it´s a procedure that might require some advanced soldering equipment / skills (however in my opinion it is a lot faster and less prone to contact errors than the Pomona adapter solutions here or there).
Getting the flash chip out
Opening the X230 is a straight-forward task - the Hardware Maintenance Manual (HMM) will lead the way. Nevertheless, here a short teardown.
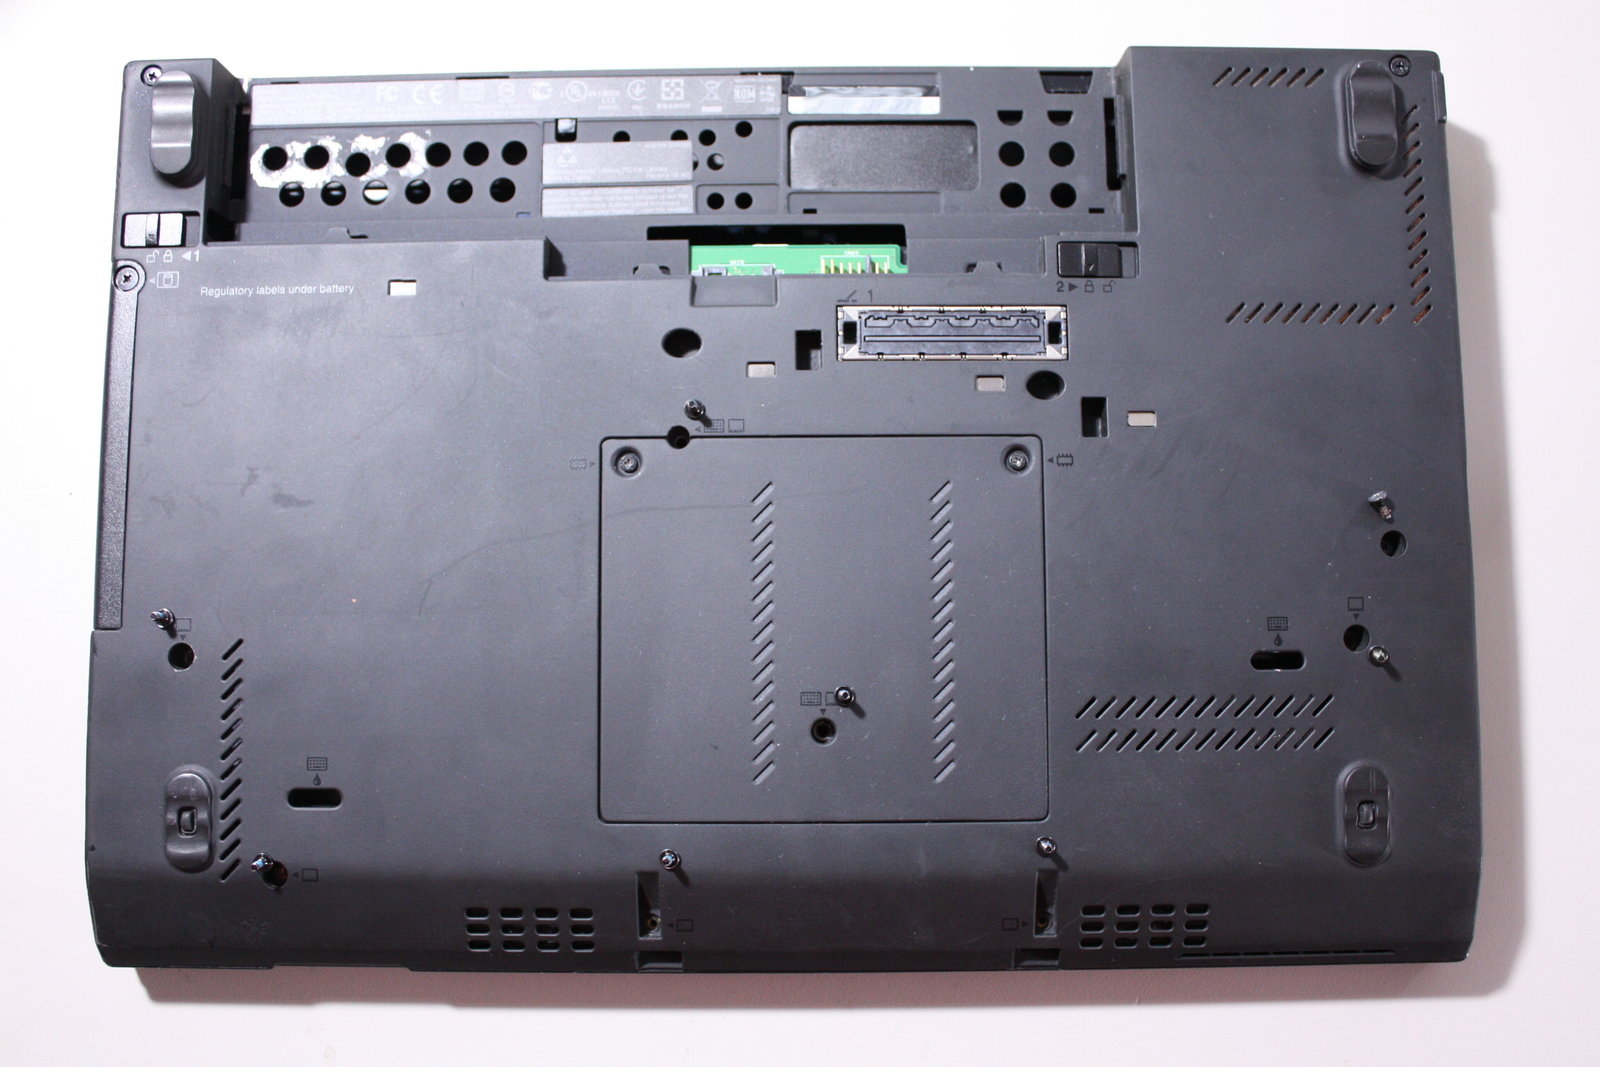
Remove the battery and the eight screws that hold the palmrest and keyboard:
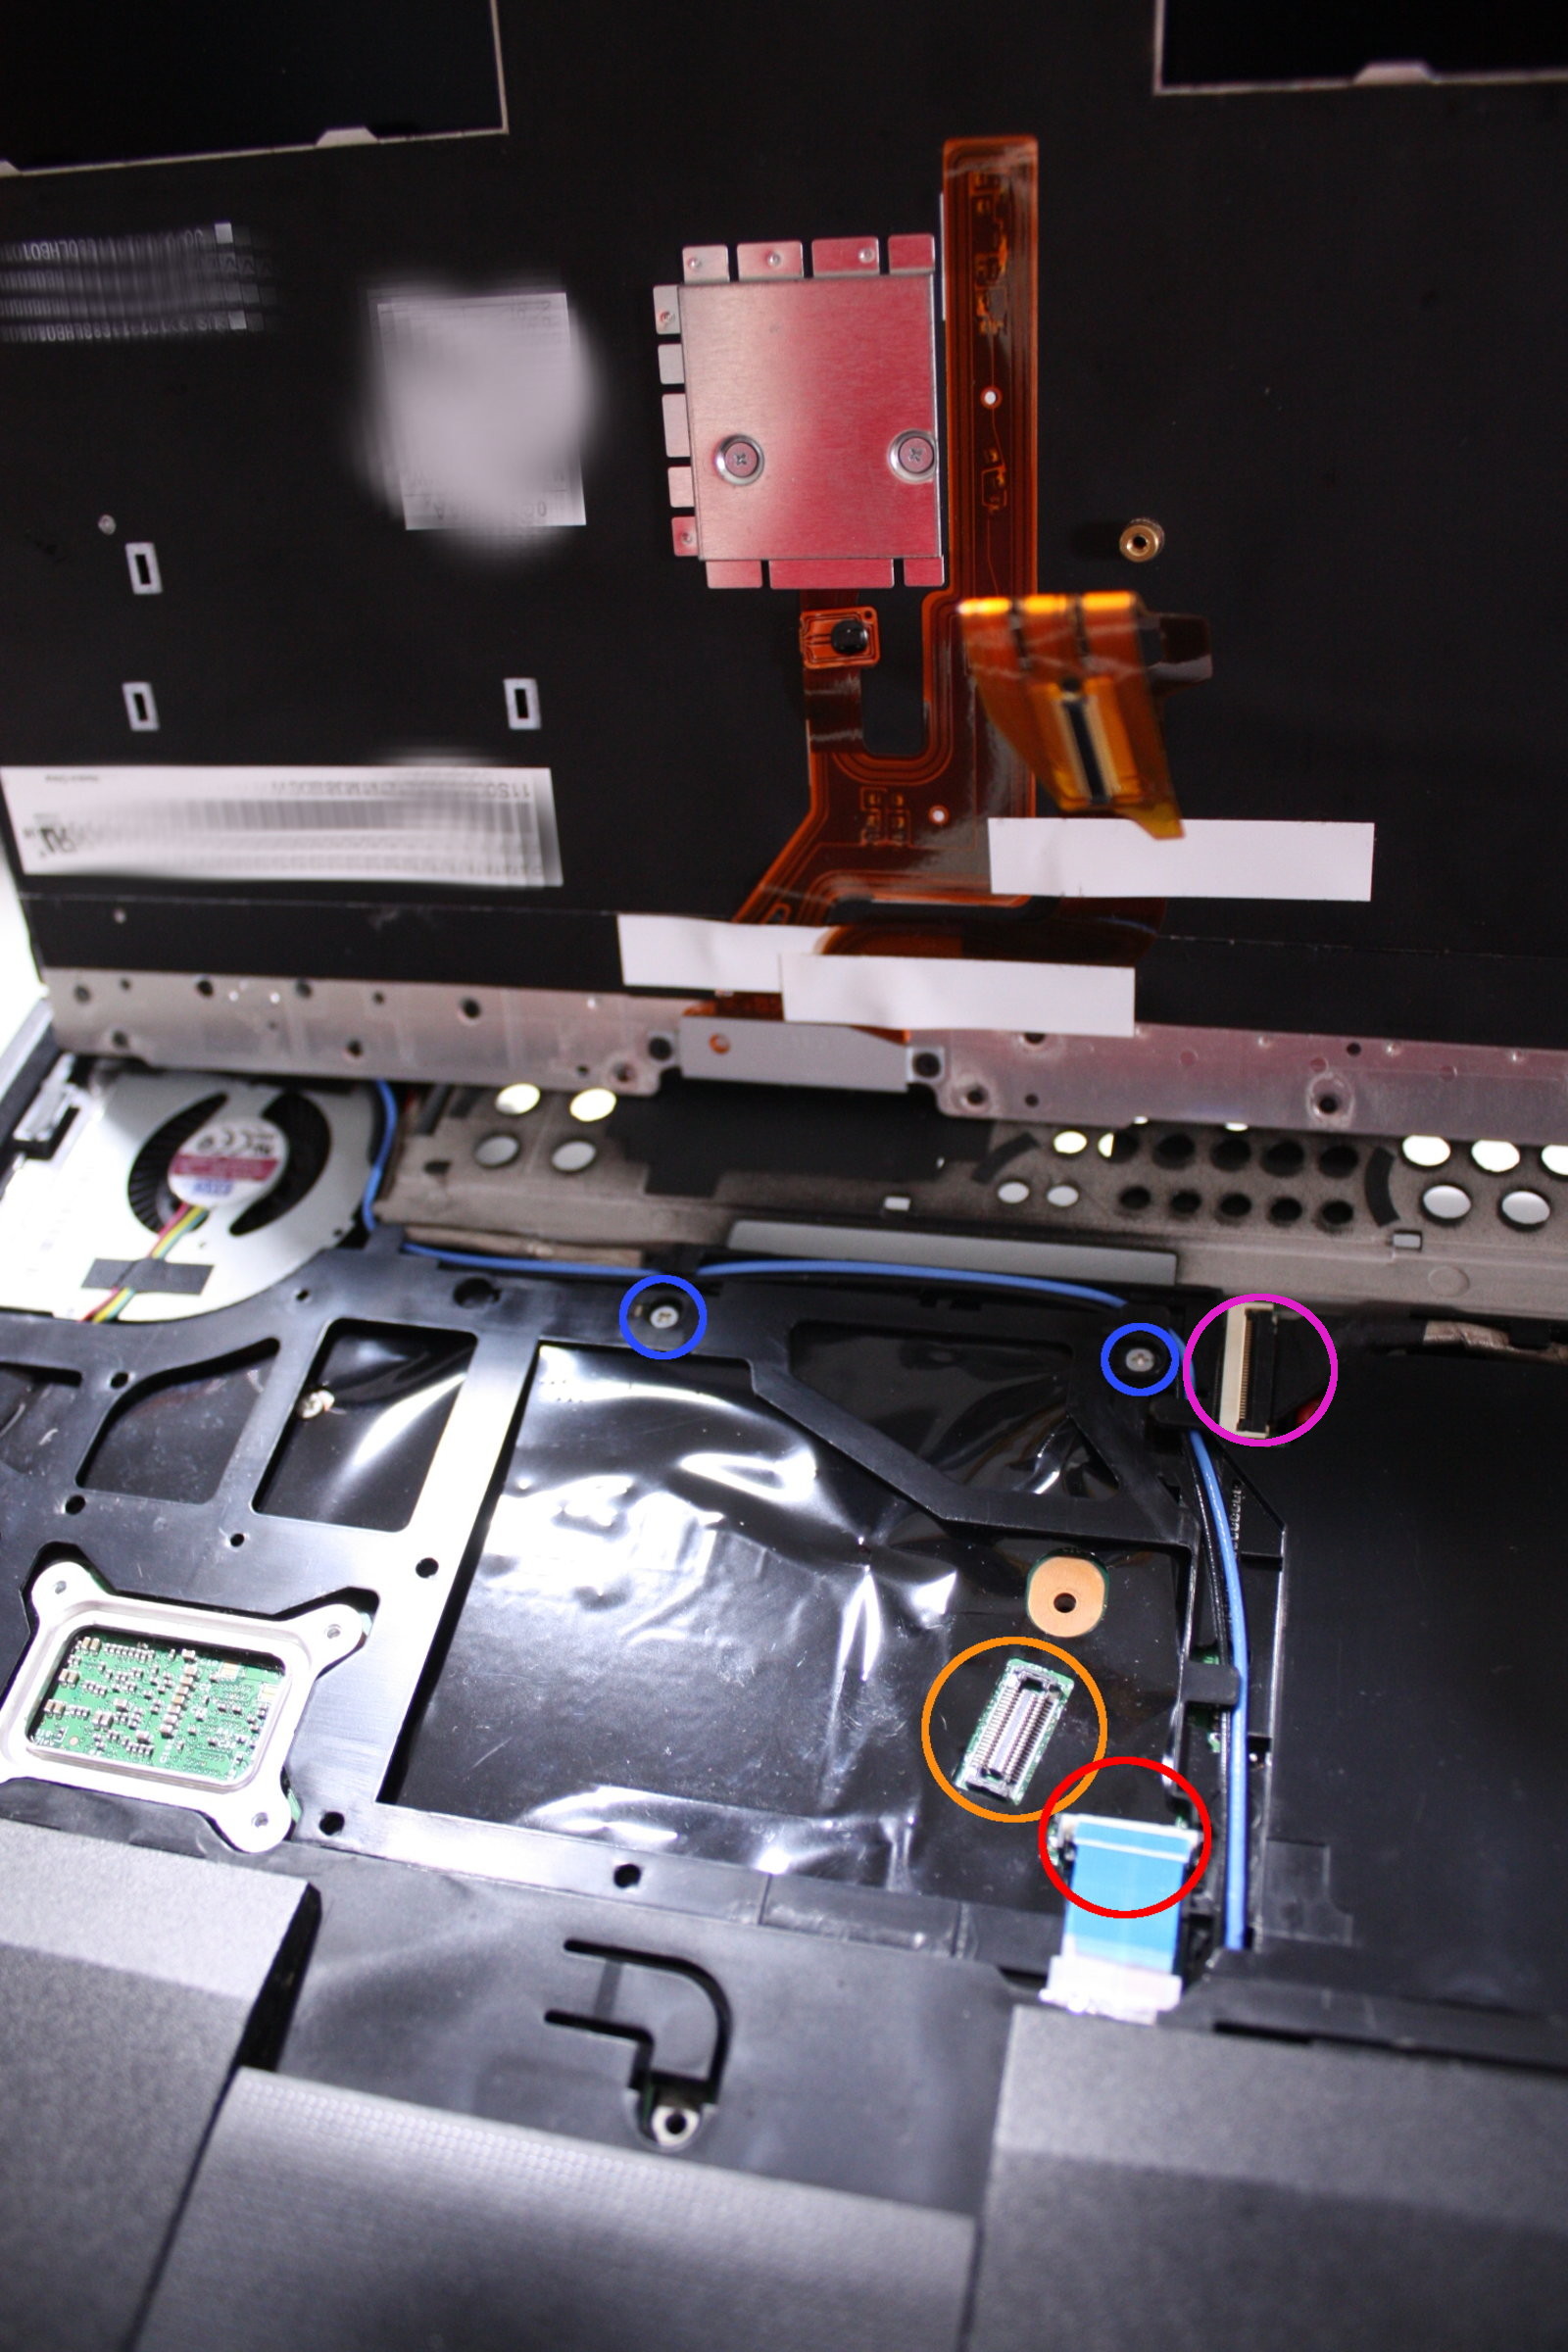
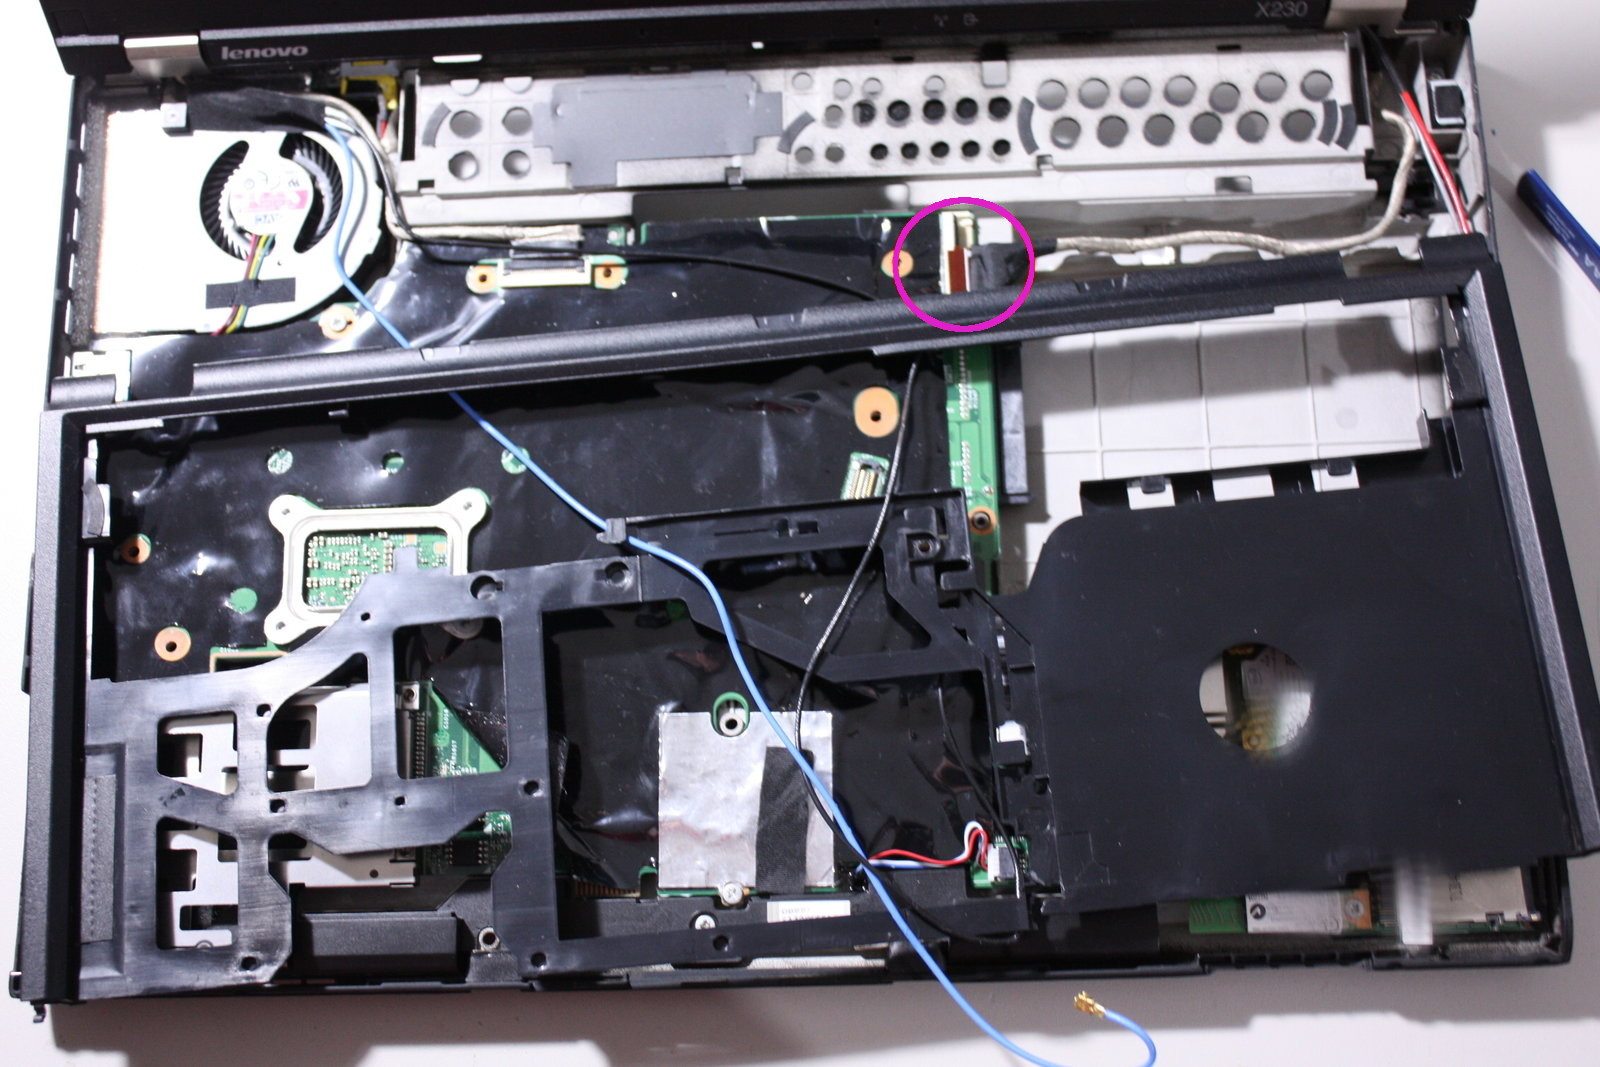
Push the keyboard towards the screen, lift it out and release the keyboard flex cable by taking it between index finger and thumb and pulling it out gently from the connector (orange circle). Remove the two silver screws (blue circles), disconnect the display cable (pink circle) and the touchpad/fingerprint-sensor flex cable (red circle).
Then take the antenna cables out of their ducts and get the keyboard bezel out.
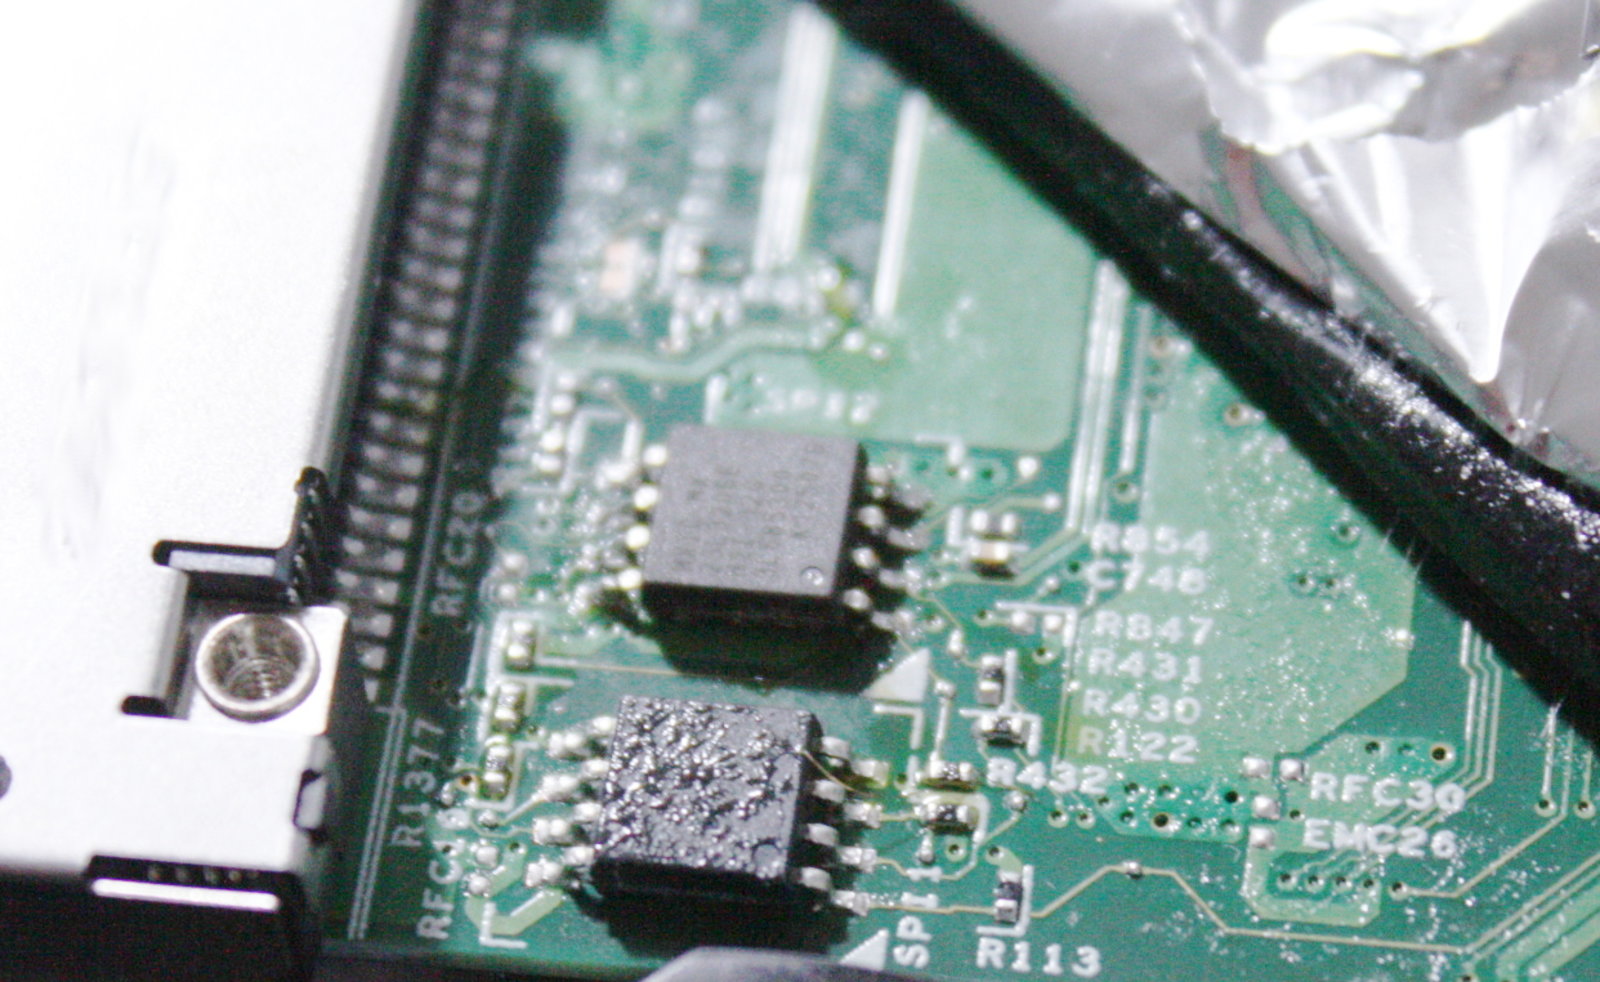
Then you can uncover the two flash chips by peeling away the black foil next to the Express card slot (blue circle):
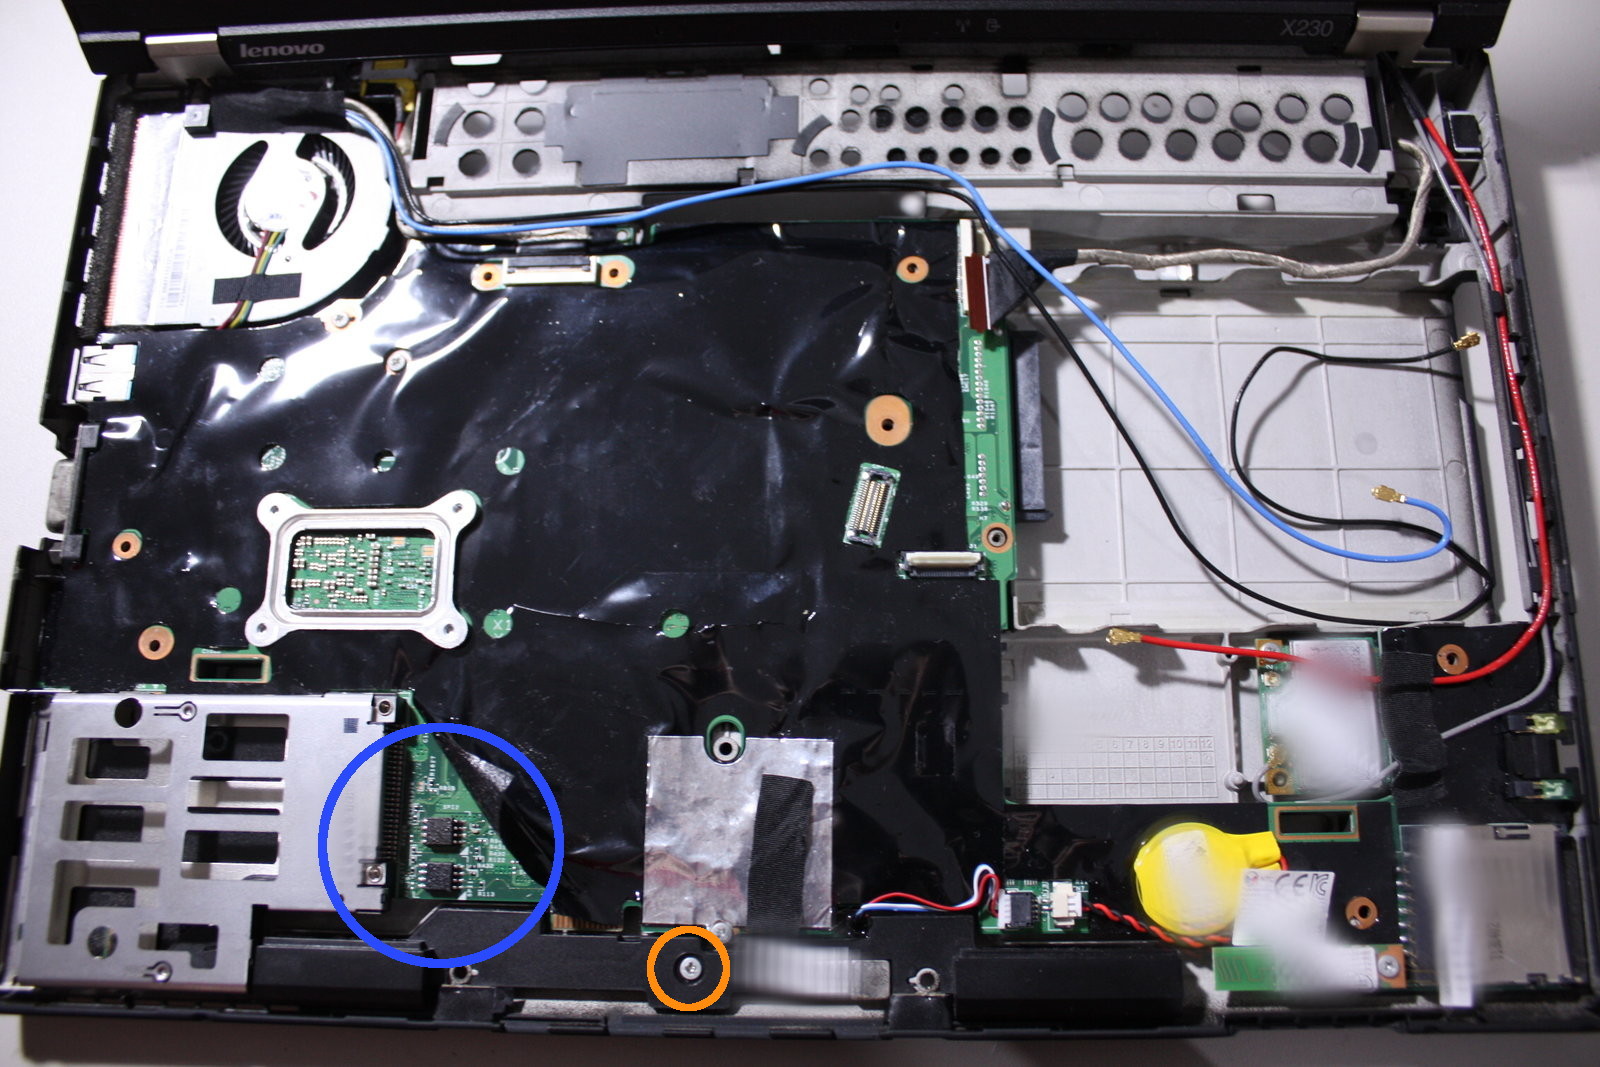
We need to take out the upper flash chip, to desolder it will require some significant heat as it is soldered to the board with lead-free solder. To avoid damages to your Thinkpad - especially its mainboard and plastic parts - be sure to remove as much as you can (e.g. take out the yellow BIOS backup battery and the plastic loudspeakers by releasing the Orange-encircled screw in the picture above). Then shield everything with aluminum foil.
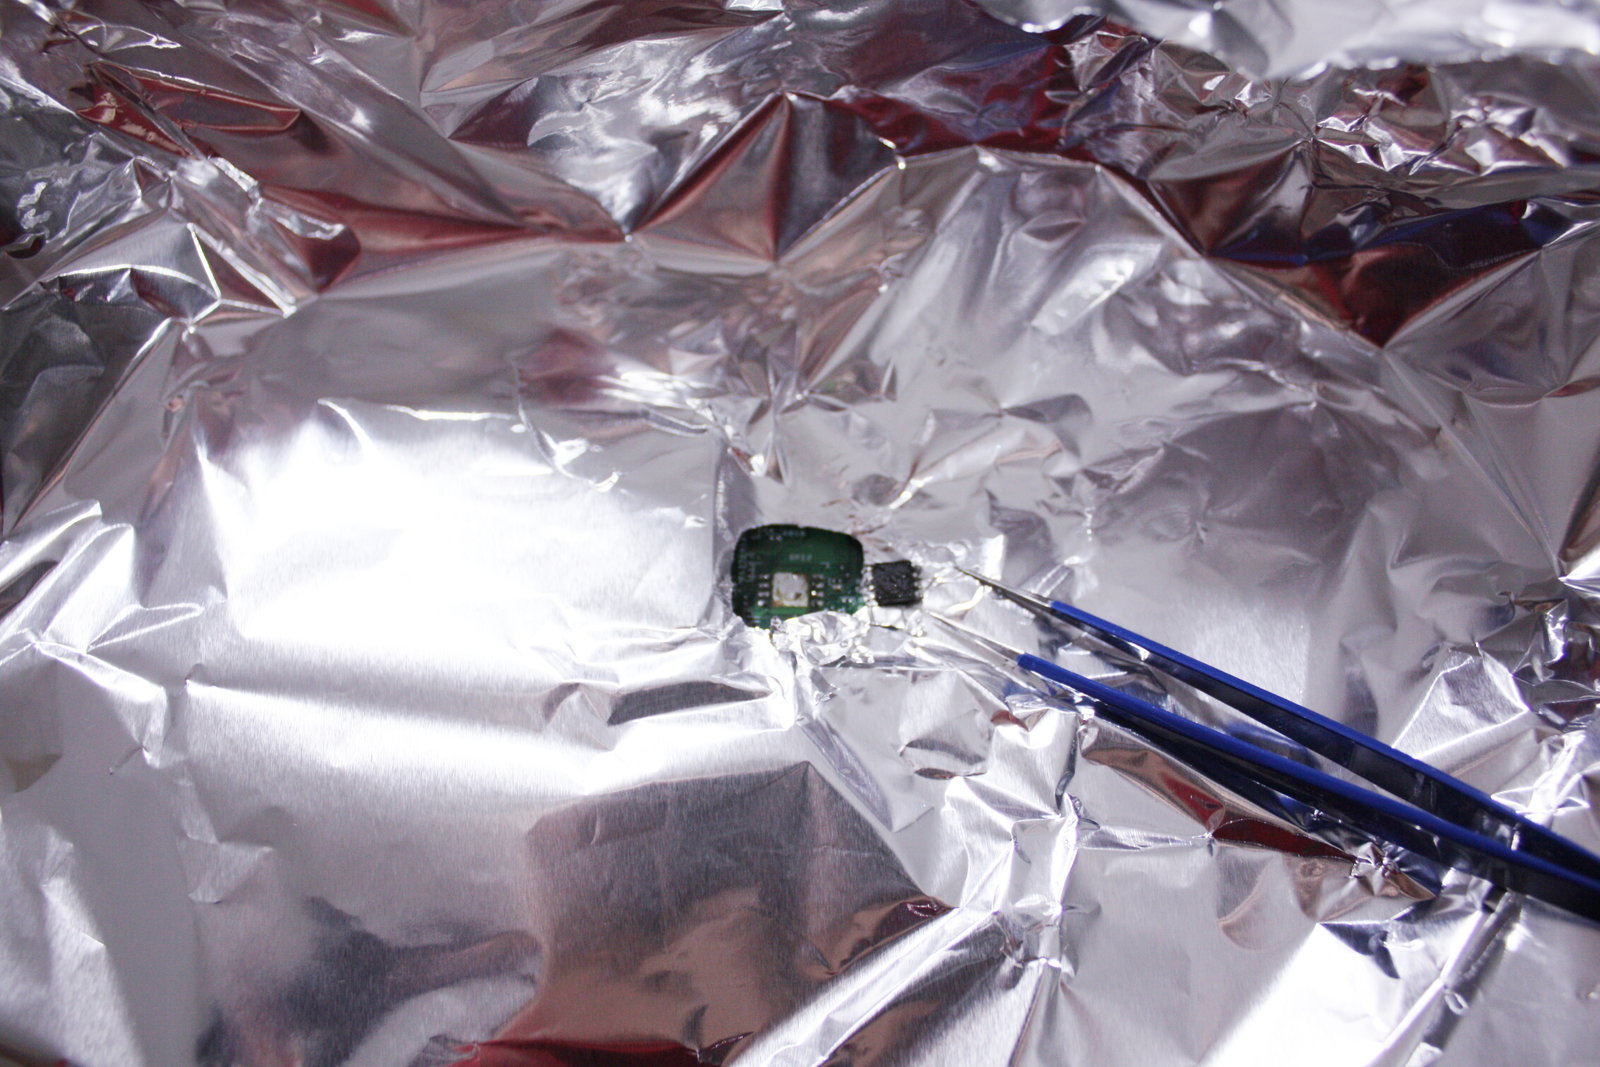
I also recommmend to use Kapton adhesive to fix the aluminum foil around the chip to the mainboard (I couldn´t find some :-/) - then you can desolder it using a fine stream of hot air directed to the chip´s legs (it took around three minutes at 300 °C to heat the area around the chip up until the solder finally melted).

To remove the adhesive rests from the chip I rubbed it on a tissue (okay...toilet) paper that I soaked in ethanol.
It´s a Macronix MX25L3206E flash chip that is perfectly compatible with the SOP8-adapter of the MiniPRO (pin 1 is marked by an encarved dot on the chip´s housing):
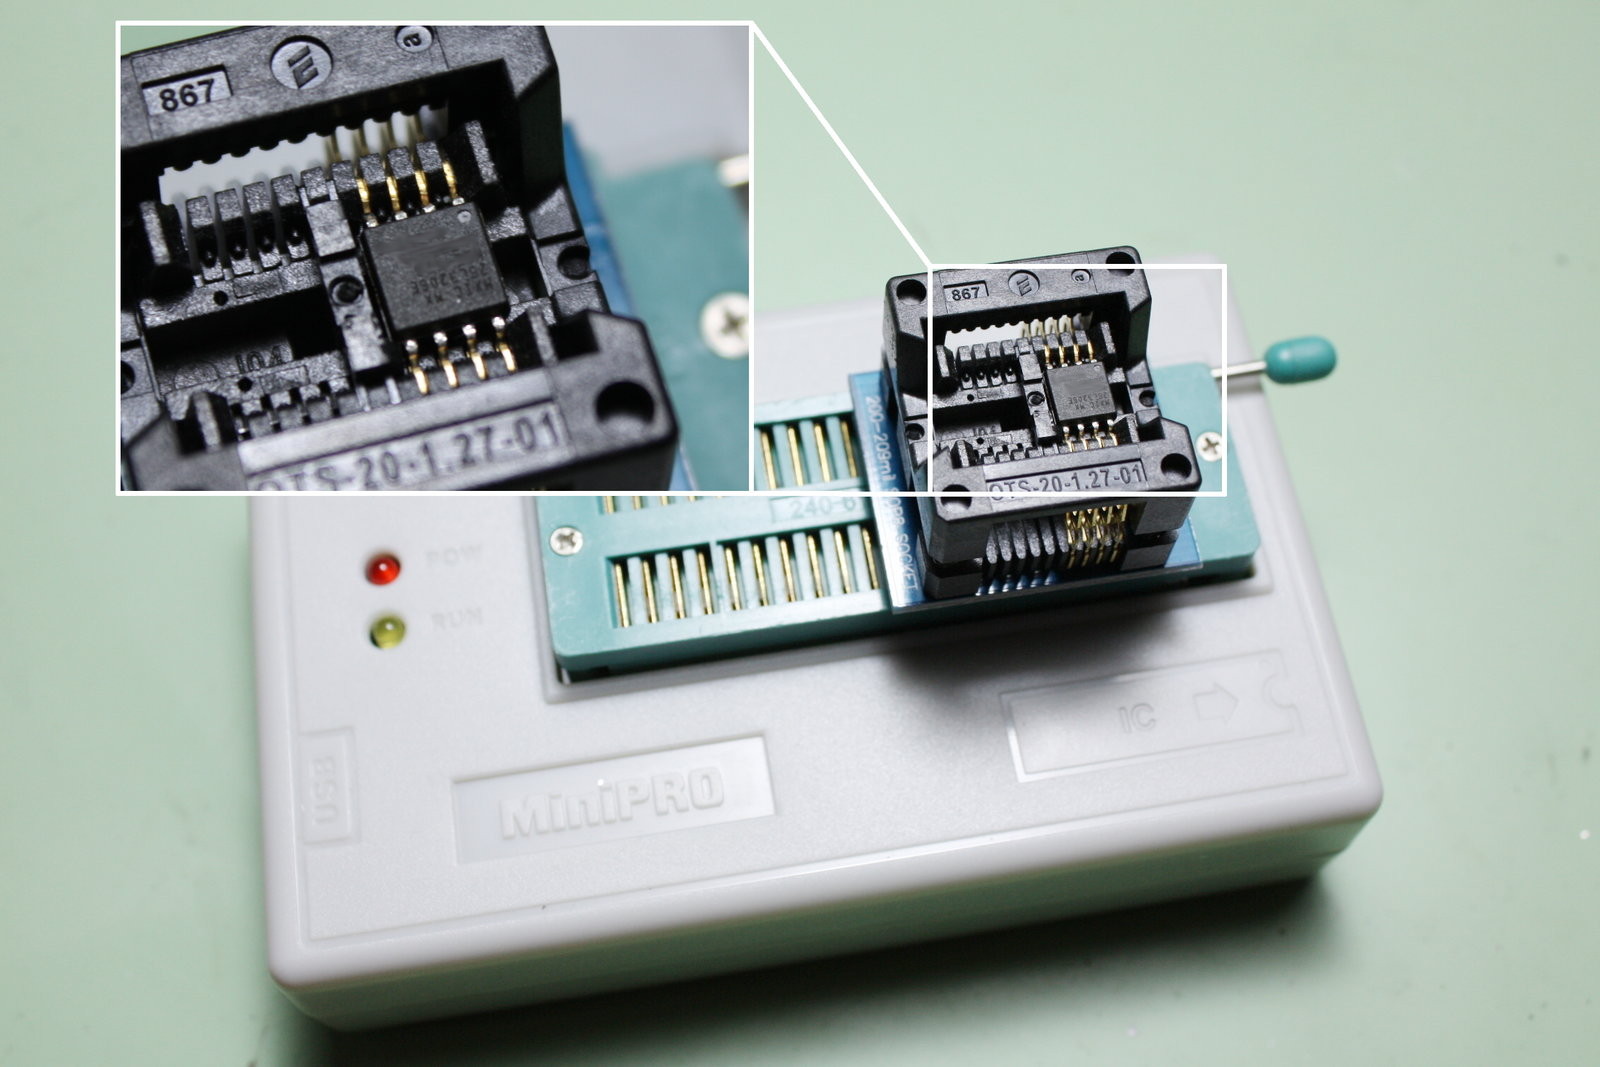
Flashing procedure
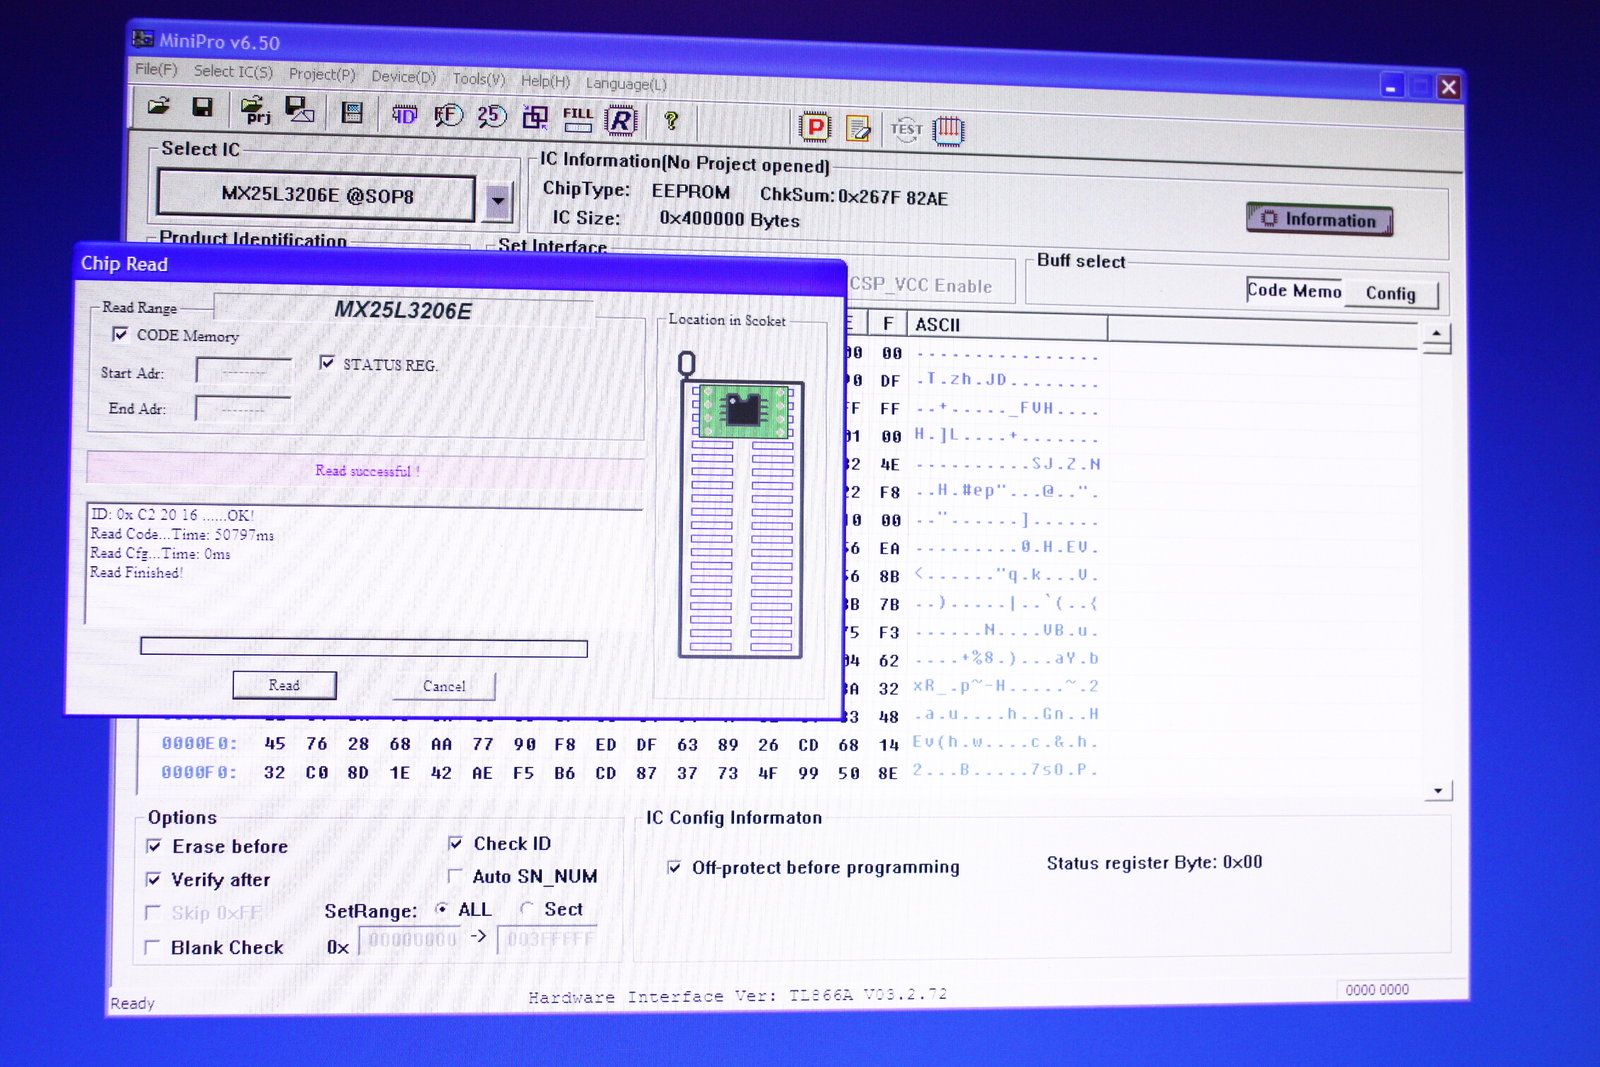
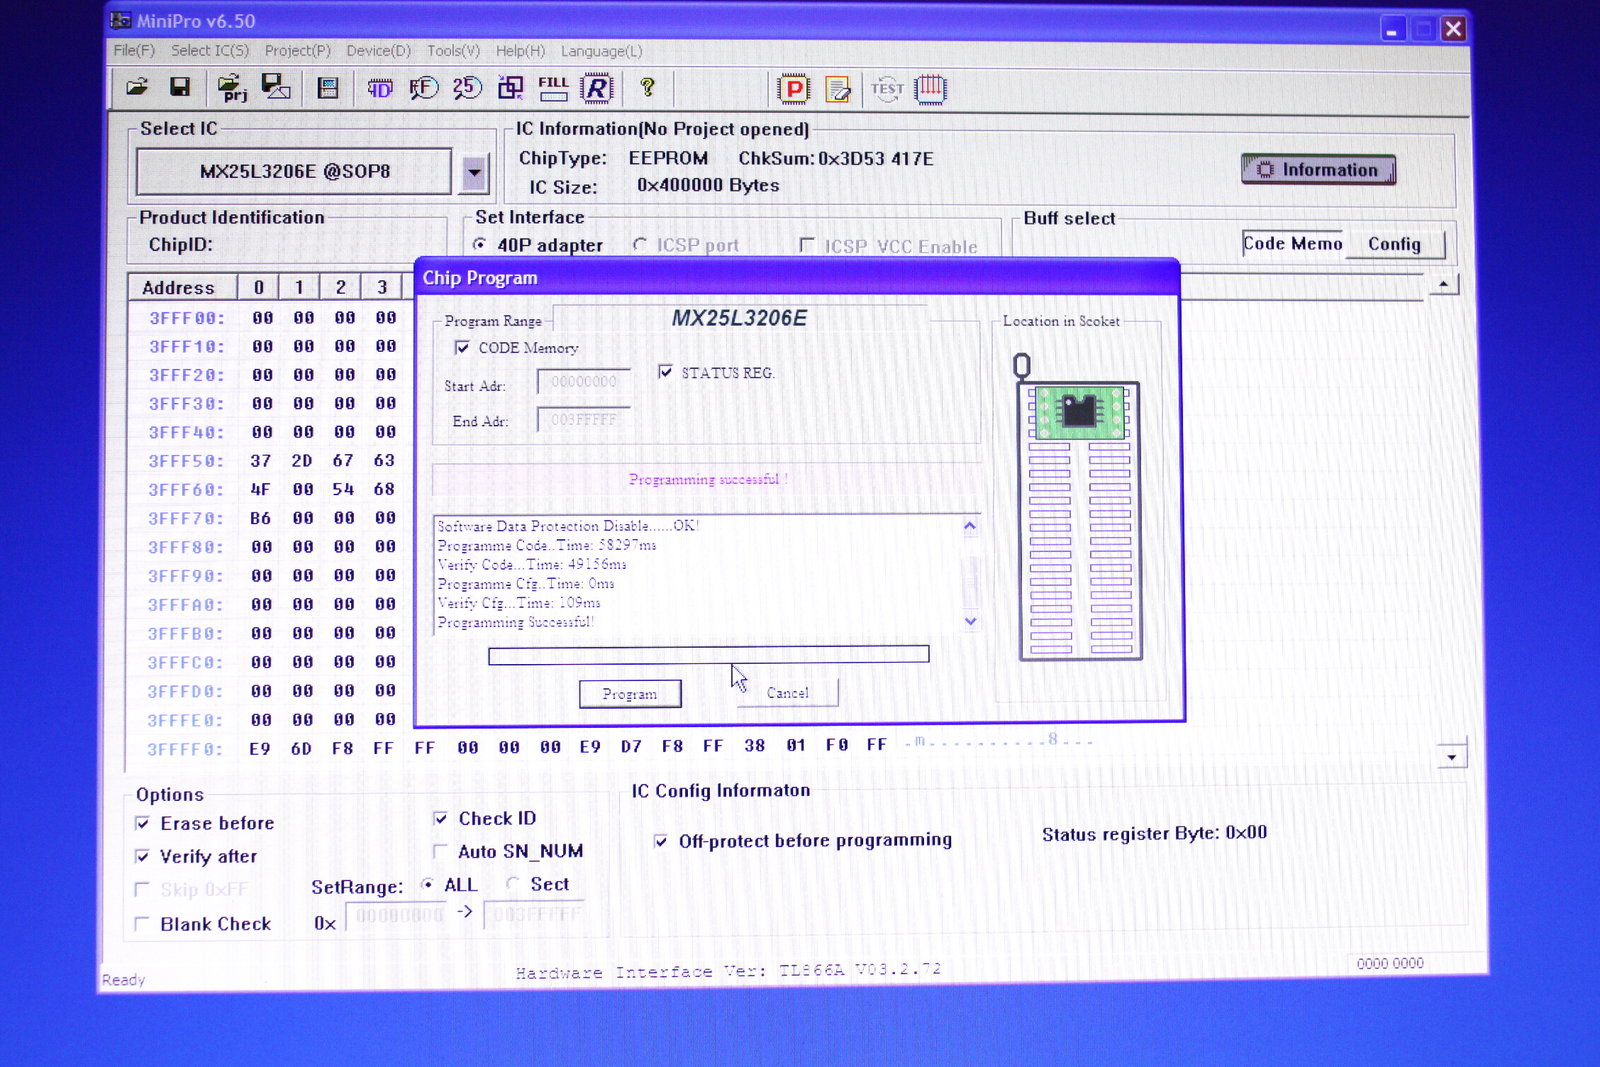
Select the MX25L3206E in the MiniPRO software, read its content out - two times just to be sure - and save the resulting files to a secure place (maybe you do not want to keep coreboot forever...).
On the left the original Lenovo firmware - on the right the coreboot image, both should have the same number of bytes.
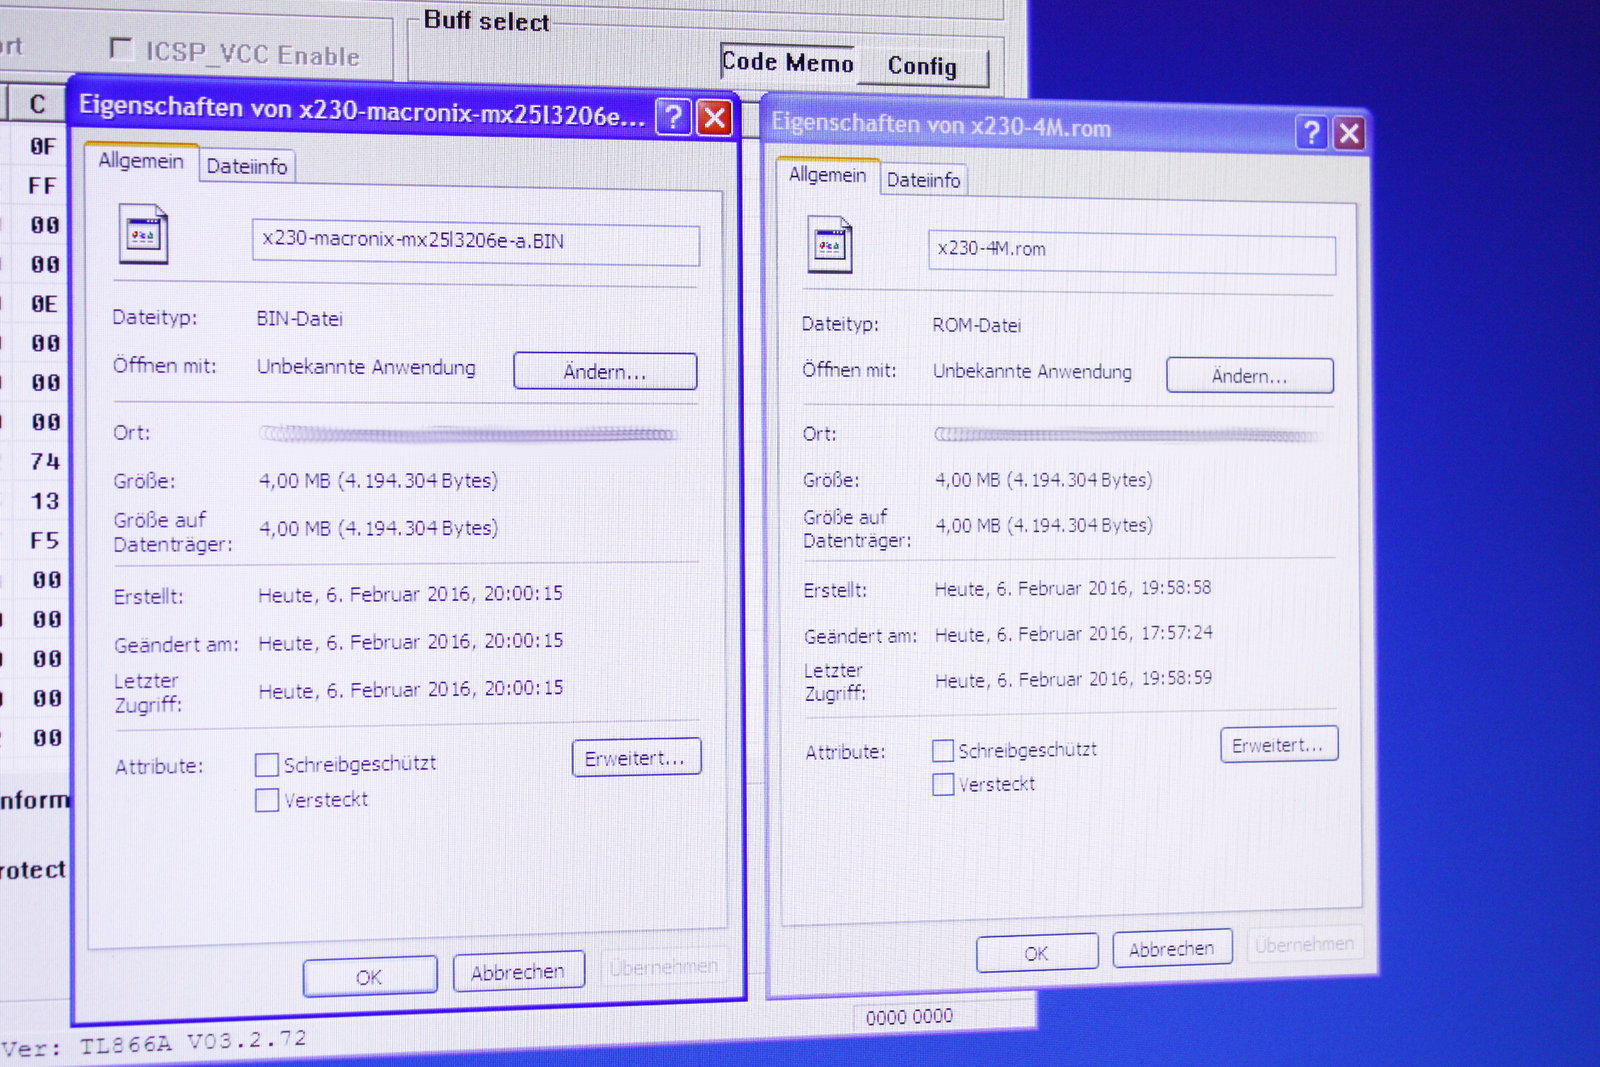
Finally, select the coreboot ROM and write it to the flash chip.
If everything worked out, resolder the chip - preferably with lead-containing solder (due to its lower melting point it will be much easier to get the chip off again if necessary).
Results
Voilà - SeaBIOS coming up blazing fast:
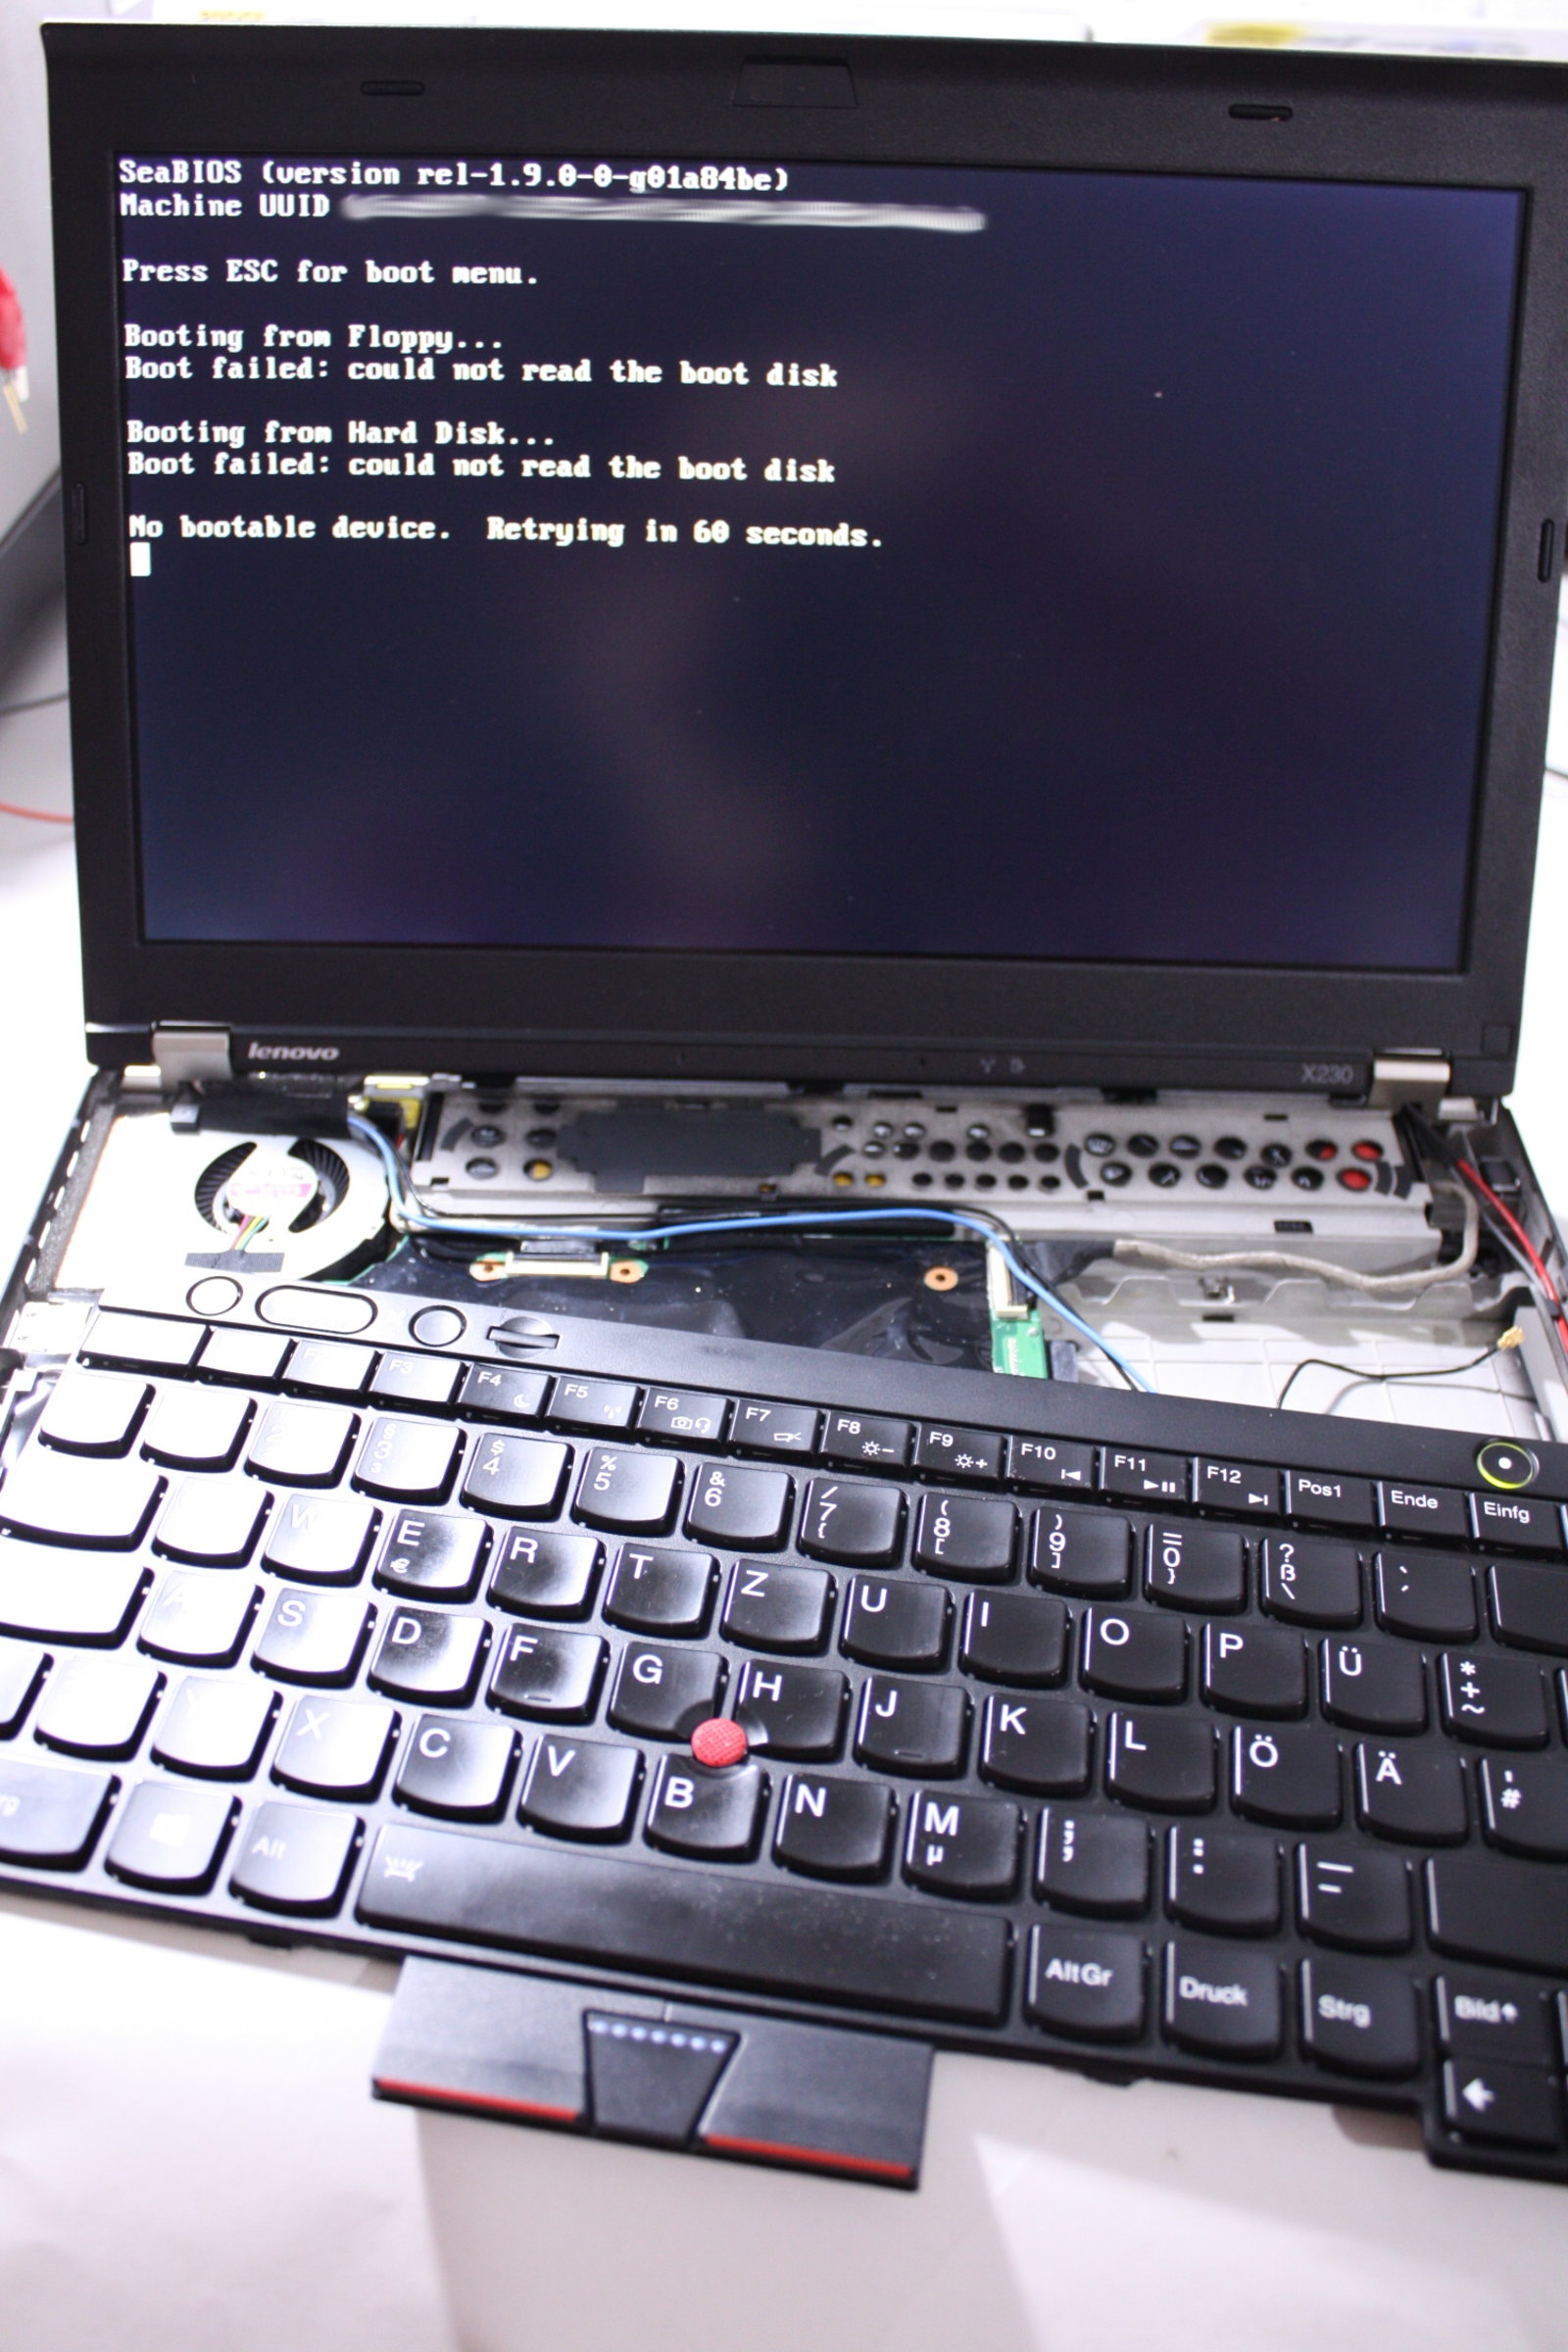
Booting to the Ubuntu 14.04 desktop is now possible in under 10 seconds (e.g. on Samsung 850 Pro) and the whitelisting issues are gone, too. But I also won´t suppress the fact that I encountered some trade-offs:
I miss Lenovo´s great oldschool BIOS for its plethora of features -> Compared to the fussy GUI-UEFIs out there (with all their eye-candy and mouse support...uahhhh), it´s still plain simple and just gets the job done.
Booting from my Kingston DTSE9 USB sticks works as long as the booted software does not need graphics in boot mode e.g. clonezilla, FreeDOS, GRML all work fine - Fedora, PartedMagic or Ubuntu don´t (I just get a "graphics initialization failed error"). To prevent these errors would require to get vgabios running.
So my current verdict:
Despite some clear drawbacks, coreboot on the X230, as well as in general, definitely has lots of potential.
greetings noq2
Comments